Expert Insights on Interior vs Exterior Painting from a Leading Painting Company Florida

Painting a space, whether it’s the inside of your home or the exterior walls, involves careful planning and an understanding of the distinct methods, materials, and challenges associated with each setting. While both interior and exterior painting aim to enhance aesthetics and protect surfaces, there are critical differences that every homeowner or project manager should be aware of before starting a painting project.
Purpose and Functionality
The primary purpose for interior painting often revolves around creating a pleasant aesthetic, improving ambiance, or refreshing outdated spaces. For exterior painting, the focus shifts toward durability and protection from environmental factors such as rain, UV rays, wind, and temperature changes.
Considerations for Interior Painting:
- Ambiance: Choosing colors that complement lighting and furnishings is essential.
- Health Concerns: Using low-VOC (volatile organic compound) or zero-VOC paints improves indoor air quality.
- Ease of Maintenance: Washable paints are ideal for high-traffic areas like kitchens or hallways.
Considerations for Exterior Painting:
- Weather Resistance: Paint must withstand moisture, extreme temperatures, and sunlight over time.
- Durability: High-quality exterior paints with additives resist cracking, peeling, mildew growth, and fading.
- Curb Appeal: The color choice should harmonize with the surrounding environment while boosting the property’s visual appeal.
Differences in Paint Composition
Interior and exterior paints are formulated differently to cater to their specific roles. Understanding these formulas can help ensure you select the right product for your project.
| Component | Interior Paint | Exterior Paint |
| Binders | Softer binders allow for smoother finishes | Tougher binders enhance durability against weather |
| Pigments | Emphasis on color richness; fade-resistance less crucial | Designed to resist UV fading |
| Additives | Minimal odor; easy clean-up | Mildew resistance; withstands extreme temperature shifts |
Surface Preparation Variances
Proper surface preparation is critical to achieving a flawless outcome regardless of whether you’re working indoors or outdoors. However, preparation requirements vary significantly between interior and exterior surfaces.
Interior Surface Preparation Tips:
- Clean walls thoroughly to remove dirt or grease.
- Fill in nail holes or cracks with spackling paste.
- Sand surfaces lightly to create a smooth base.
- Apply painter’s tape along edges for clean lines.
- Prime surfaces if switching between drastically different colors.
Exterior Surface Preparation Tips:
- Pressure-wash walls to eliminate dirt, mold, grime, or peeling paint.
- Scrape off loose paint using a scraper or wire brush.
- Repair any damaged wood siding or masonry cracks.
- Apply caulk around windows and doors to seal gaps.
- Use an appropriate primer designed for outdoor conditions.
Tools Required
Interior Painting Tools:
– Drop cloths
– Rollers with medium nap covers
– Painter’s tape
– Angled brushes for cutting-in corners
Exterior Painting Tools:
– Extension ladders
– Pressure washer
– Stiff wire brushes
– Long-handled rollers with thick nap covers
Expert Recommendations
Hiring professional painters can add significant value by ensuring proper surface preparation techniques are followed while selecting premium materials suited specifically for your type of project—whether interior or exterior.
By recognizing these key distinctions in scope between interior vs exterior painting projects—ranging from material composition through preparation methods—you’ll achieve better results tailored precisely to each area’s unique demands without compromising durability aesthetics longevity efficiency
Tips from Florida painters: Understanding the Biggest Differences in Paint Types for Interior and Exterior Projects
When planning a painting project, one of the most significant decisions revolves around selecting the right type of paint. Interior and exterior paints are formulated differently to meet their respective performance requirements. Understanding these distinctions is critical for achieving long-lasting results and ensuring the durability of your work.
https://www.kickstarter.com/profile/kendallpestcontrol/about
Key Differences Between Interior and Exterior Paints for House Painters Florida
1. Binders
The binder in paint is responsible for adhesion and determines how well the paint sticks to a surface:
– Interior Paints: Use a softer binder to resist cracking or peeling when exposed to cleaning, scrubbing, or general contact within indoor spaces.
– Exterior Paints: Contain stronger binders that enhance durability against harsh weather conditions such as rain, snow, UV rays, and temperature fluctuations.
2. Additives
- Interior Paints: Often include additives focused on stain resistance, ease of cleaning, and smooth application. These paints are designed to withstand interior activities without fading or discoloration over time.
- Exterior Paints: Include additives like mildewcides (to prevent mold growth) and UV blockers that help protect surfaces exposed to outdoor elements.
3. Pigments
Pigments are what give paint its color:
– Interior Paints: Designed with pigments resistant to fading under artificial lighting conditions found indoors.
– Exterior Paints: Contain fade-resistant pigments engineered to maintain vibrancy despite prolonged exposure to sunlight.
4. Volatile Organic Compounds (VOCs)
VOCs contribute to paint fumes:
– Interior Paints: Formulated with lower VOC levels for improved indoor air quality since they will be used in enclosed spaces.
– Exterior Paints: May contain higher VOC levels because ventilation isn’t a concern outdoors.
Interior vs Exterior Paint: Key Differences Explained by Painting Services Florida
| Feature | Interior Paint | Exterior Paint |
| Binder Strength | Softer; focus on flexibility indoors | Stronger; designed for weather resistance |
| Stain Resistance | High; easier cleaning | Moderate; less focus on stain removal |
| UV Resistance | Minimal | High; protects against sunlight |
| Mold/Mildew Protection | Low | High; prevents outdoor surface damage |
| VOC Levels | Low | Higher |
Practical Interior & Exterior Painting Florida Applications
- Use only interior paint indoors, as it lacks the durability needed for outdoor conditions.
- For projects exposed directly to weather or sun (e.g., fences or siding), rely specifically on exterior paint.
- Consider hybrid products like “interior/exterior” paints if your project involves surfaces that transition between inside and outside spaces (e.g., garage doors).
Expert Recommendations
For best results:
– Match your project’s environmental needs with the specific properties of each type of paint.
– Always consult product labels or ask professionals about recommended applications based on surface material (wood, metal, drywall) and location.
Understanding these key differences ensures you select materials that maximize both performance and longevity tailored precisely for your project’s unique demands.
How Proper Surface Preparation Impacts Interior and Exterior Painting Success
Proper surface preparation is one of the most critical steps in achieving a long-lasting and visually appealing paint job. Whether you’re tackling an interior or exterior painting project, neglecting this step can lead to poor adhesion, uneven finishes, and faster deterioration over time. In this section, we’ll explore how surface preparation differs for interior and exterior projects and why it plays such a vital role in the final outcome.
Importance of Surface Preparation for Painting
- Improved Adhesion: Properly prepared surfaces allow paint to bond effectively, reducing issues like peeling or bubbling.
- Enhanced Durability: A well-prepped surface is less prone to wear and tear over time.
- Aesthetic Appeal: Smooth surfaces result in even application and better overall appearance.
- Cost Efficiency: Investing time in prep work reduces future maintenance costs by increasing the longevity of the project.
Steps in Surface Preparation for Interior Painting
- Remove dirt, grease, dust, and grime using mild detergents or cleaners.
- For kitchens or bathrooms where grease buildup is common, use degreasers.
- Patch holes or cracks with spackling paste or joint compound.
- Sand rough areas smooth to avoid uneven finishes.
- Use fine-grit sandpaper to remove old paint layers (if necessary) or create a smooth base for priming.
- Apply an appropriate primer depending on the surface type (e.g., drywall primer for walls). This step ensures even absorption of paint and enhances color vibrancy.
- Protect furniture, floors, and fixtures by covering them with drop cloths or plastic sheeting.
- Use painter’s tape to mask edges for sharp lines during application.
Steps in Surface Preparation for Exterior Painting
- Remove dirt, loose paint flakes, mildew, algae growths, and other contaminants using a pressure washer.
- Scrape off any peeling or flaking old paint using a putty knife or scraper.
- Fill cracks in stucco walls with masonry filler.
- Replace rotted wood sections before painting wooden trims or siding.
- Smooth out any rough spots left from scraping to create an even base layer for new paint.
- Use exterior-grade primers specifically designed to withstand harsh outdoor elements like UV rays and moisture exposure.
- Protect landscaping features such as plants with tarps while ensuring windows are taped off properly before starting work.
Comparing Interior vs Exterior Surface Prep: A Quick Table
| Aspect | Interior Prep | Exterior Prep |
| Cleaning | Mild detergent cleaning | Pressure washing |
| Repairs | Patching plaster/drywall | Filling cracks/replacing materials |
| Environmental Exposure | Limited (indoor-controlled environment) | High (sunlight/rain/humidity/wind) |
| Primer Type | Indoor-specific primers | Weather-resistant primers |
Expert Tips for Successful Surface Preparation
- Always inspect surfaces thoroughly before beginning; unseen damage can compromise results later.
- Match your tools (e.g., scrapers/sanders) with the material being worked on—wood requires different handling than concrete.
- Be mindful of drying times after cleaning; moisture can interfere with adhesion if not fully dried before priming/painting begins.
- Don’t skip priming; it acts as a bonding agent between your surface layer(s) while helping maximize coverage efficiency during application stages later on.
Taking time upfront to ensure proper surface preparation will save you time—and money—in the long term while delivering professional-grade results that last longer regardless of whether you’re working inside your home’s living spaces or enhancing its curb appeal outdoors through external repaint efforts!
How Proper Surface Preparation Impacts Interior and Exterior Painting Success
Proper surface preparation is one of the most critical steps in ensuring a long-lasting, high-quality paint job for both interior and exterior projects. While it can often be overlooked in favor of more visible steps like color selection or application techniques, preparation forms the foundation for successful painting. Below, we’ll explore how surface preparation differs between interior and exterior painting and why neglecting this step can lead to costly and time-consuming issues.
The Role of Surface Preparation
Surface preparation ensures that paint adheres properly to the substrate, creating a uniform finish that resists peeling, cracking, or fading over time. Properly preparing surfaces also helps to address any pre-existing issues such as dirt buildup, moisture damage, or structural imperfections that could negatively impact the final result.
Key Steps for Interior Painting Preparation
- Cleaning Surfaces: Remove dirt, dust, grease, or stains using a mild detergent or household cleaner.
- Filling Holes & Cracks: Use spackling paste or wood filler to repair any holes or cracks in walls or trim.
- Sanding: Lightly sand surfaces with fine-grit sandpaper to remove imperfections and ensure better paint adhesion.
- Priming: Apply an appropriate primer based on the surface type (e.g., drywall primer for new walls) to create a uniform base layer.
- Masking & Taping: Protect areas like baseboards, trim, and windows with painter’s tape before starting the project.
Unique Challenges of Exterior Surface Preparation
- Power Washing: A pressure washer is often used to remove dirt, mold, algae, and loose paint from exterior walls.
- Scraping & Sanding: For peeling paint or rough areas caused by weather exposure, scraping off old layers followed by sanding ensures a smooth finish.
- Repairing Damage: Address cracks in stucco or masonry with patch compounds designed for outdoor use; repair wood rot where necessary.
- Priming for Protection: Use primers formulated specifically for outdoor durability to combat moisture penetration and promote adhesion.
- Caulking Joints & Seams: Seal gaps around windows, doors, and siding with exterior-grade caulk to prevent water infiltration.
| Key Differences Between Interior & Exterior Prep | Interior | Exterior |
| Cleaning Method | Mild detergent for dust/grease | Power washing for grime/mold buildup |
| Primers | Drywall/wood-specific primers | Weatherproof primers |
| Repair Techniques | Spackling paste/fillers | Patch compounds/carpentry repairs |
Why Skipping Surface Prep is Risky
Failing to properly prepare surfaces leads to common problems such as bubbling paint due to trapped moisture or flaking caused by poor adhesion. These issues not only compromise aesthetics but also reduce the lifespan of your paint job—potentially requiring costly repainting sooner than anticipated.
For lasting results:
1. Follow manufacturer recommendations on cleaning products and primers.
2. Allocate sufficient time during the prep phase rather than rushing into painting.
3. Consider hiring experienced painters who prioritize thorough preparation.
By investing effort into meticulous surface prep tailored specifically for your project—whether indoors or outdoors—you set the stage for a flawless finish that stands up against wear over time.
Schedule a Professional Consultation to Bring Your Painting Vision to Life
When it comes to painting projects, a professional consultation can make all the difference between a good result and an exceptional one. Whether you’re refreshing the interior of your home or enhancing its exterior curb appeal, consulting with professionals allows you to align your vision with expert guidance. Below, we explore the benefits of scheduling a professional consultation and how it can elevate your painting project.
Benefits of a Professional Painting Consultation
- Tailored Recommendations
A professional consultation ensures that you receive customized advice based on your space, preferences, and goals. Experts take into account factors such as lighting, color schemes, architectural style, and intended function of the area. - Material and Color Expertise Experienced painters have in-depth knowledge about paint types, finishes, and color palettes. They can help you:
- Choose durable paints suited for high-traffic areas like hallways or kitchens.
- Opt for weather-resistant coatings for outdoor surfaces like siding or decks.
- Select colors that complement furniture, flooring, or landscaping elements.
- Accurate Project Assessments
Professionals assess your space thoroughly during consultations to identify: - Existing surface issues (cracks, peeling paint).
- Necessary repairs (patching holes or sanding uneven areas).
- Any prep work required for long-lasting results.
- Budget Planning Insight
A consultation provides clarity on costs by breaking down expenses related to labor, materials, and additional services such as priming or caulking. This allows you to plan more effectively without unexpected surprises. - Improved Efficiency With professional input early in the process:
- Timelines can be outlined realistically based on project scope.
- Resources are utilized more effectively to avoid delays.
What to Expect During a Consultation
- Initial Discussion: Share your vision for the project—discuss desired styles, colors, textures—and any specific concerns (e.g., moisture-prone walls).
- On-Site Inspection: The consultant will examine surfaces for preparation needs and assess environmental factors like ventilation or sunlight exposure that could affect the final finish.
- Sample Presentation: You may receive physical samples or digital renderings showcasing potential options suited for your project’s requirements.
- Detailed Proposal: Following the session, most professionals provide an itemized plan detailing timeline, cost estimates, materials needed, and steps involved in achieving your desired results.
Questions to Ask During Your Consultation
- What type of surface preparation is recommended?
- Which paint brands or products would work best for this project?
- How will weather conditions impact exterior painting schedules?
- Can I see examples of previous work similar to my vision?
- Are there any maintenance tips post-painting I should be aware of?
Comparison Table: Professional vs DIY Painting Approach
| Aspect | Professional Painting | DIY Painting |
| Expertise | Access to trained specialists | Relies on personal knowledge/skills |
| Time Efficiency | Streamlined with organized processes | Potentially time-consuming |
| Surface Preparation | Thorough assessment & repair | May overlook important prep steps |
| Cost | Higher upfront investment | Lower initial costs but risk of errors |
| Final Result | High-quality finish | May vary depending on skill level |
Scheduling a professional consultation is an effective way to ensure every detail of your painting project is addressed meticulously while saving time and effort in achieving beautiful results that stand the test of time.
Exploring the Essential Factors to Consider When Planning a Painting Project
Planning a painting project, whether for your home or a commercial property, requires thoughtful consideration. A well-prepared approach not only ensures visually pleasing results but also helps maximize the longevity of the painted surfaces. Below are some essential factors to keep in mind when planning your painting project.
1. Purpose of the Project
Before starting your painting project, identify its purpose.
Determine whether you’re looking to:
– Refresh outdated wall colors
– Increase property value before selling
– Protect exterior surfaces from weather damage
– Create a specific ambiance in living or workspaces
Understanding your goals will guide decisions regarding paint type, color selection, and budget allocation.
2. Paint Type and Finish Selection
| Surface Type | Recommended Paint Type | Finish Options |
| Interior Walls | Latex or acrylic | Matte, satin, eggshell |
| Exterior Surfaces | Acrylic latex with weatherproofing | Satin or semi-gloss for durability |
| High Moisture Areas | Mold-resistant or mildew-resistant | Semi-gloss for easy cleaning |
Additionally, test sample colors under different lighting conditions to ensure they meet your expectations.
3. Surface Preparation Requirements
- Cleaning surfaces to remove dust, grease, and debris
- Repairing cracks or holes in walls
- Sanding rough patches for even application
- Applying primer where necessary (e.g., unpainted drywall or stained surfaces)
Skipping these steps can lead to uneven finishes and reduced durability.
4. Weather Conditions and Timing (For Exterior Projects)
When planning an exterior painting project, consider local weather patterns. Extreme heat, cold temperatures, rain, or high humidity can interfere with drying times and paint adhesion. Ideal conditions typically fall within:
– Temperatures between 10°C – 30°C (50°F – 85°F)
– Dry days with low humidity levels
Schedule outdoor projects during favorable seasons to ensure optimal results.
5. Budgeting Effectively
Establishing a realistic budget is vital for avoiding unexpected expenses mid-project. When calculating costs:
1. Account for materials like paint, brushes/rollers, tape, drop cloths
2. Include professional labor charges if hiring painters
3. Add extra funds (10%-15%) as a contingency buffer
Request multiple quotes from contractors if outsourcing the work to compare pricing against quality assurances.
6. Environmental Impact
Environmental considerations are becoming increasingly important in modern painting projects:
– Opt for low-VOC (volatile organic compound) paints for improved indoor air quality
– Responsibly dispose of leftover paint through recycling programs
– Reuse tools like brushes and trays wherever possible
Making eco-conscious decisions benefits both personal health and the planet.
Final Checklist Before Starting Your Project
- Confirm color choices with samples on actual walls/surfaces.
- Gather all tools needed (brushes, rollers, trays).
- Ensure proper ventilation indoors during application.
- Protect furniture/flooring with drop cloths.
- Double-check that all planned areas are prepped adequately.
Taking these preparatory steps ensures that your painting project proceeds smoothly while delivering professional-quality results tailored to your vision needs.
- Expert Insights on Interior vs Exterior Painting from a Leading Painting Company Florida
- How Florida painters Recommend Painting Your House and Inspiring Wall Ideas
- How Often Should Florida Painters Repaint Your Home’s Exterior for Long-Lasting Beauty
- How Often Should House Painters Florida Recommend Repainting Your House Exterior for Lasting Beauty
- How Often Should Florida Painters Repaint Your Home for Optimal Aesthetic and Protection
- How Often Should Florida Painters Repaint the Exterior of Your Home and Why It Matters
- How Often Should You Repaint Your Home with a Painting Company Florida to Keep It Looking Fresh and Beautiful
- Finding the Right Painting Company Florida for a Stunning Interior Transformation
- Room-by-Room Guide: How Florida Painters Recommend Repainting Your House Interior
How Florida painters Recommend Painting Your House and Inspiring Wall Ideas

Painting your home is not just about aesthetics; it plays a significant role in protecting your walls, enhancing durability, and maintaining the value of your property. Knowing when to repaint can save you from costly repairs later while keeping your home looking fresh. This section will explore how often you should paint your house and creative wall painting ideas to inspire your next project.
How Often Should You Paint Your House?
| Surface Type | Recommended Repainting Interval |
| Exterior Walls (Stucco) | Every 5-6 years |
| Exterior Walls (Wood Siding) | Every 3-7 years |
| Interior Walls | Every 5-10 years |
| Trim and Baseboards | Every 2-4 years |
| Ceilings | Every 10-15 years |
Consider Environmental Factors:
- Weather Exposure: Homes in areas with extreme sunlight or heavy rain might require more frequent exterior repainting.
- Coastal Regions: Salt air can corrode paint faster, making annual inspections vital.
- Interior Traffic: High-traffic areas like hallways or children’s rooms may need touch-ups every few years.
Creative Wall Painting Ideas
Once you’ve decided it’s time to paint, why not explore unique ideas to give your space character? Below are some creative suggestions for both interior and exterior projects.
Accent Walls
Accent walls are an excellent way to create focal points in any room. Choose bold or contrasting colors for one wall while keeping the others neutral.
Tips for Choosing the Right Accent Wall Color:
– Use deep shades like navy blue or forest green for a cozy atmosphere.
– Opt for bright colors like yellow or coral to energize small spaces.
– Match the accent wall color with furniture or décor items for a cohesive look.
Geometric Patterns
Geometric designs add an element of modernity and sophistication. Use painter’s tape to create triangles, hexagons, or diagonal stripes.
Steps to Create Geometrical Patterns:
1. Sketch out your design on paper first.
2. Apply base coat color and let it dry completely.
3. Use painter’s tape to outline shapes before applying secondary colors.
Stenciled Designs
Stenciling allows you to replicate intricate designs without hiring a professional artist. Choose floral patterns, abstract shapes, or even typography that complements your style.
Ombre Walls
Ombre effects involve blending two or more shades seamlessly across the wall – darker at the bottom transitioning into lighter tones at the top.
Key Tips:
– Use colors from the same family (e.g., light blue into dark blue).
– A sponge roller creates smoother gradients compared to traditional brushes.
Final Thoughts
Whether it’s maintaining your home’s façade by repainting regularly or experimenting with bold designs indoors, painting is an accessible way to revamp any space efficiently. Knowing when and how often each part of your home needs attention ensures you balance practicality with creativity effectively.
Finding the Right Painting Company Florida Trusts for a Flawless Finish
A flawless paint job is not just about selecting the right color or applying multiple coats. The underlying plastering plays a critical role in determining the overall finish, durability, and visual appeal of painted surfaces. Ignoring the condition of plaster can lead to uneven textures, peeling paint, or even structural issues over time. Here’s an in-depth look at how underlying plastering affects painting outcomes and ways to ensure a solid foundation for your next project.
Why Plastering Matters Before Painting
- Uneven Paint Finish: Any cracks, holes, or bumps in the plaster will show through the paint.
- Shortened Paint Lifespan: Poorly prepared surfaces can cause accelerated peeling or cracking.
- Difficulty in Achieving Desired Aesthetics: Textures from damaged plaster may prevent you from achieving smooth finishes or clean lines.
Plaster not only enhances the structural integrity of walls but also ensures that your paint adheres properly and lasts longer.
Common Issues with Underlying Plaster
- Cracks – Hairline cracks can be caused by structural movement or improper curing of previous layers.
- Dampness – Moisture seeping through walls can lead to bubbling paint and mold growth.
- Flaking Plaster – Loose sections of old plaster need to be removed before applying fresh coatings.
- Uneven Surfaces – Misshapen areas can create visible imperfections after painting.
Preparing Your Walls for Painting
- Check all surfaces for cracks, holes, damp spots, or flaking areas that need repair.
- Use filler materials specifically designed for patching up cracks or holes in plaster.
- Sand down uneven sections once repairs are complete.
- Identify sources of moisture (e.g., leaks) and address them before proceeding with repairs.
- Consider using waterproof primers for areas prone to dampness.
- For older walls with significant imperfections, adding a thin skim coat layer can help create a perfectly smooth surface.
- Always use an appropriate primer suited for your wall type (e.g., masonry primer for brick walls). Primers improve adhesion and seal porous surfaces.
How Proper Plastering Enhances Paint Performance
| Aspect | Without Proper Plastering | With Proper Plastering |
| Paint Longevity | Reduced lifespan due to peeling | Increased durability |
| Texture Consistency | Uneven appearance | Smooth surface |
| Adhesion Strength | Weak bond between wall & paint | Stronger coating adhesion |
| Aesthetic Appeal | Visible dents/cracks | Seamless finish |
Professional vs DIY Plaster Repairs
While minor repairs like filling small cracks can often be done yourself using premixed fillers and simple tools like putty knives, larger issues—such as extensive damp damage or cracked ceilings—may require professional attention. Skilled professionals have access to advanced techniques like re-plastering entire sections with precision tools for long-lasting results.
Taking shortcuts with preparation might save time initially but could result in costly fixes down the road if paint fails prematurely due to poor substrate conditions.
By prioritizing high-quality underlying plaster work before painting begins, you set the stage for impeccable results that’ll stand up beautifully over time while protecting your investment in both materials and labor efforts alike.
How House Painters Florida Ensure a Perfect Paint Job with Proper Plastering
Achieving a flawless paint job is not solely about selecting the right colors or using premium-quality paints. A significant yet often overlooked factor is the condition of the underlying plastering. Properly prepared plaster can ensure durability, enhance aesthetics, and prevent future problems such as cracks or peeling. Below, we’ll explore why plastering matters, common issues to look for, and how to address them for a seamless finish.
Why Plastering Matters in Painting
- Uneven Application: Defects in the plaster create an uneven surface that makes it difficult to apply paint smoothly.
- Reduced Longevity: Cracked or flaky plaster can lead to paint peeling over time.
- Moisture Problems: Imperfections can allow moisture infiltration, resulting in mold growth and damage.
By ensuring proper preparation of your walls through quality plastering, you can avoid these problems and achieve a polished result.
Common Issues with Underlying Plaster
- Hairline cracks: Small but noticeable cracks that can show through even after painting.
- Structural cracks: Larger cracks indicating potential foundational problems.
- Loose chunks or powdery surfaces undermine adhesion between paint layers.
- Moisture causes bubbling of both plaster and paint over time.
- Rough patches or depressions disrupt smooth application.
Steps to Prepare Plaster for Painting

- Inspect Your Walls Carefully examine all surfaces for signs of damage such as cracks, dampness, or crumbling areas.
- Fill small cracks with high-quality filler suitable for interior or exterior use.
- For larger or structural issues, consult a professional contractor.
- Sand Down Uneven Areas Use fine-grit sandpaper to smooth out rough areas and ensure uniformity across all surfaces.
- Seal Any Moisture Apply a moisture-resistant primer if you detect damp spots after repair work.
- Prime the Surface A primer not only helps seal imperfections but also allows better adhesion between the wall and the final coat of paint.
Tools and Materials Needed for Repair Work
| Tool/Material | Purpose |
| Filler | To patch small holes and minor cracks |
| Sandpaper (Fine Grit) | To smooth out uneven surfaces |
| Putty Knife | For applying filler |
| Primer | To seal patches and ensure adherence |
Benefits of Properly Prepared Plaster
- Enhanced durability of your painted surface
- Reduced likelihood of cracking or peeling
- Improved overall appearance with a smooth finish
- Cost savings by preventing frequent repainting due to underlying issues
By addressing these elements upfront, you’ll set the stage for a long-lasting and visually appealing result while reducing maintenance efforts down the road.
Enhance Your Space with Expert Painting Services Florida
Interior painting offers a fantastic opportunity to refresh your living space and give it a completely new look. With the right techniques, colors, and tools, you can transform your home into a reflection of your personal style while also increasing its overall aesthetic value. Below are some unique interior painting tips to guide you in creating a polished and inspiring environment.
Embrace Accent Walls for Visual Impact
- Choose the right wall: Pick a wall that naturally draws attention, such as the one behind a bed or sofa.
- Experiment with bold colors: Rich hues like deep teal, mustard yellow, or emerald green can make striking statements.
- Try patterns or textures: Consider using stencils, stripes, or geometric designs for added interest.
Explore Creative Painting Techniques
- Ombre effect: Blend two or more shades seamlessly for a gradient appearance on your walls. This technique works well in bedrooms and living rooms for a soft and sophisticated look.
- Sponging: Use a sponge to dab paint onto walls for textured effects that add depth.
- Color blocking: Divide walls into sections with different colors to achieve modern aesthetics.
- Metallic finishes: Incorporate metallic paints like gold or silver for an elegant touch.
Optimize Your Color Choices
| Room Type | Recommended Colors | Effect/Feel |
| Living Room | Neutral tones (beige/grey) | Relaxing & versatile |
| Bedroom | Soft pastels (blue/lavender) | Calm & serene |
| Kitchen | Warm tones (yellow/orange) | Inviting & energizing |
| Office | Greens/blues | Productivity & focus |
Prioritize Prep Work for Professional Results
- Clean walls thoroughly to remove dust and grease.
- Repair cracks or holes using spackling paste.
- Tape off edges using painter’s tape for sharp lines.
- Use drop cloths to protect furniture and flooring.
Proper preparation also ensures paint adheres better and lasts longer.
Layer Your Lighting with Paint Colors
- For rooms with natural light, opt for hues that complement sunlight without being overly bright.
- In spaces relying on artificial light, warmer tones help balance cooler LED lighting effects.
By understanding how light interacts with paint choices, you can create an atmosphere tailored specifically to each area of your home.
Transforming your home through interior painting involves creativity combined with thoughtful planning. When done correctly, it revitalizes any space while reflecting individuality through design choices tailored uniquely toward personal preferences.
Enhance Your Space with Expert Interior & Exterior Painting Florida Tips
Interior painting is one of the most effective ways to refresh and transform your living space. With the right techniques, color palettes, and creative ideas, you can achieve a distinctive look that resonates with your personality. Below are some unique interior painting tips to help you craft an inviting and visually captivating home.
1. Experiment with Accent Walls
Accent walls are an excellent way to add depth and intrigue to any room. Instead of painting all four walls in one color, choose a single wall to highlight with a bold or contrasting shade. This technique creates a focal point in the room while adding dimension.
Tips for Accent Walls:
– Use darker shades like deep navy or forest green for a dramatic effect.
– Opt for brighter colors such as coral or mustard yellow in smaller rooms to create energy.
– Consider textured finishes, wallpapers, or stenciling for added interest.
2. Leverage Color Psychology
Colors can influence mood and perception in subtle but profound ways. When selecting paint colors, think about how they make you feel and their purpose in specific rooms.
Recommended Colors by Room Function: | Room Type | Suggested Colors | Effect | |——————-|—————————|——————————| | Living Room | Neutral tones (beige, gray) | Warmth and sociability | | Bedroom | Soft blues/greens | Calmness and relaxation | | Kitchen/Dining | Yellows or warm reds | Energy and appetite stimulation | | Home Office | Shades of green | Focus and productivity |
3. Try Two-Tone Walls
Create visual interest by using two complementary colors on the same wall. For instance, paint the upper part of the wall in one shade (e.g., soft white) and the lower portion in another (e.g., pastel blue). The division can be marked with molding or left simple for a modern look.
Pro Tips:
– Use painter’s tape for clean lines between colors.
– Choose lighter hues on top to make ceilings appear higher.
– Match furniture or decor accents with your chosen tones.
4. Add Texture with Paint Techniques
Flat walls can feel uninspired without texture. Explore different paint application methods to add complexity to your interior design.
Popular Textured Paint Techniques:
– Sponging: Use a sponge dipped in paint for a soft, textured finish.
– Rag Rolling: Create subtle patterns by rolling a cloth over wet paint.
– Ombre Effect: Blend shades from light to dark across an entire wall.
– Metallic Finishes: Add shimmer for an upscale appearance.
Each technique requires careful attention during application but delivers striking results that elevate your home’s aesthetic value.
5. Incorporate Geometric Patterns
Geometric shapes are modern yet timeless when incorporated into interiors. Consider painting triangles, stripes, hexagons, or other patterns onto feature walls for added vibrancy.
How-To Steps for Geometric Painting:
1. Sketch out your desired pattern on paper first.
2. Mark shapes onto the wall using painter’s tape as a guide.
3. Use different colors within each section of the pattern.
4. Remove tape once dry for crisp edges.
This approach works well in children’s bedrooms, offices, and contemporary living spaces where creativity is encouraged.
6. Don’t Forget About Ceilings
Ceilings are often overlooked during interior painting projects but offer excellent opportunities for creative design expressions.
Options for Ceiling Treatments:
– Bold Colors: Brighten up rooms with painted ceilings that contrast against neutral walls.
– Patterns: Stencil designs like stars or clouds above children’s areas.
– High Gloss Finish: Add elegance through reflective paints that mimic mirrors.
Painting ceilings can dramatically alter how spacious or cozy a room feels based on its height relative to color choices.
By incorporating these unique tips into your next project, you’ll not only enhance the aesthetic appeal of your interiors but also create spaces that reflect individuality while maintaining functionality throughout your home environment.
- Expert Insights on Interior vs Exterior Painting from a Leading Painting Company Florida
- How Florida painters Recommend Painting Your House and Inspiring Wall Ideas
- How Often Should Florida Painters Repaint Your Home’s Exterior for Long-Lasting Beauty
- How Often Should House Painters Florida Recommend Repainting Your House Exterior for Lasting Beauty
- How Often Should Florida Painters Repaint Your Home for Optimal Aesthetic and Protection
- How Often Should Florida Painters Repaint the Exterior of Your Home and Why It Matters
- How Often Should You Repaint Your Home with a Painting Company Florida to Keep It Looking Fresh and Beautiful
- Finding the Right Painting Company Florida for a Stunning Interior Transformation
- Room-by-Room Guide: How Florida Painters Recommend Repainting Your House Interior
How Often Should Florida Painters Repaint Your Home’s Exterior for Long-Lasting Beauty

Maintaining the exterior of your home doesn’t just enhance curb appeal, but it also protects your property from weather-related wear and tear. Knowing how often to repaint your home’s exterior is key to ensuring its long-term beauty and structural integrity.
Tips from House Painters Florida for Repainting Your Home
The frequency of repainting largely depends on several factors, including the type of material, the region’s climate, and the quality of the previous paint job.
| Material | Repainting Frequency |
| Wood siding | Every 3-7 years |
| Aluminum siding | Every 5-10 years |
| Stucco | Every 5-6 years |
| Brick (painted) | Every 15-20 years (if maintained) |
| Fiber cement siding | Every 10-15 years |
Factors Influencing Paint Longevity with Painting Services Florida
- Climate Conditions
Homes in areas with extreme heat, humidity, or heavy rain may require more frequent repainting due to faster paint degradation. - Sun Exposure
Direct sunlight can cause paint to fade or blister over time. North-facing walls may not need as much attention as south-facing ones. - Paint Quality
High-quality paints last longer than budget options. Investing in premium exterior paint with UV protection and weather-resistant properties pays off in the long term. - Preparation & Application
Proper preparation, including cleaning surfaces and applying primer, ensures better adhesion and durability of the paint. - Maintenance Practices
Regular cleaning and addressing minor cracks or peeling promptly can help extend the lifespan of your home’s paint.
The Benefits of Timely Interior & Exterior Painting Florida
- Protection Against Moisture: Paint acts as a barrier to prevent water damage that can lead to rot or mold.
- Enhanced Curb Appeal:A freshly painted home boosts its aesthetic value, making it more attractive to visitors or potential buyers.
- Cost Savings Over Time: Addressing peeling or cracking early avoids more extensive repairs down the road.
- Improved Energy Efficiency: Reflective paints can regulate indoor temperatures by deflecting sunlight, reducing energy costs.
Tips for Determining When to Repaint
- Look for signs of peeling, cracking, or bubbling on painted surfaces.
- Check for fading colors, especially on sun-exposed areas.
- Examine caulk around windows and doors; if it’s brittle or breaking apart, it may coincide with needing fresh paint.
- Test painted wood by pressing gently; soft spots may indicate rot beneath damaged paint layers.
By proactively assessing your home’s exterior regularly and adhering to recommended painting intervals specific to its materials and environment, you’ll enjoy a stunning appearance while preventing costly future repairs.
Key Warning Signs Your Home Needs a Fresh Coat from a Painting Company Florida
Repainting your home’s exterior is not just about maintaining curb appeal; it’s a critical step in protecting your property from environmental damage. Over time, paint naturally degrades due to exposure to sun, rain, and other elements. Recognizing the warning signs that indicate it’s time for a fresh coat of paint can save you time, money, and potential structural damage.
Common Warning Signs That Your Exterior Needs Repainting
- One of the most obvious indicators that your home needs repainting is peeling or cracking paint. This occurs when moisture seeps beneath the surface, causing the paint to lose adhesion.
- If left unchecked, peeling or cracking can expose your home to rot and decay.
- Fading is typically caused by prolonged exposure to UV rays. Darker colors tend to fade faster than lighter shades.
- If you notice significant discoloration on sun-exposed surfaces, it may be time for a refresh.
- Chalking occurs when fine powder forms on the surface of painted walls due to weathering.
- While some chalking is normal over time, excessive chalking indicates that the paint has lost its durability.
- Bubbling happens when moisture becomes trapped under the paint layer. This can occur if inadequate preparation was done before painting or if water infiltration isn’t addressed.
- Bubbles are not only unsightly but also a sign of potential water damage.
- Paint acts as a protective barrier against moisture for wood siding and trim.
- If you notice rotting wood beneath chipped or worn-out paint, immediate action is required before repairs become more extensive.
- Caulking around windows and doors may shrink or crack over time due to weather changes.
- When caulking deteriorates, it compromises your home’s protection against drafts and water intrusion.
- Mildew and mold often appear as dark spots on painted surfaces in areas with high humidity.
- These growths indicate excess moisture and should be addressed promptly during repainting efforts.
How Long Should Exterior Paint Last?
The lifespan of exterior paint varies depending on several factors: | Type of Surface | Estimated Lifespan | |———————–|——————-| | Wood Siding | 3-7 years | | Aluminum/Vinyl Siding | 10-15 years | | Stucco | 5-10 years | | Brick | 15-20 years |
Factors such as climate conditions, quality of paint used, and prep work also influence how long your exterior finish will last.
Benefits of Addressing Issues Early
Ignoring these warning signs can lead to more significant problems down the line:
– Increased repair costs for damaged siding or wood
– Reduced energy efficiency from compromised insulation
– A negative impact on property value
Repainting at the right time safeguards not only your home’s structure but also its aesthetic appeal.
Proactive Maintenance Tips
To extend the lifespan of your exterior paint:
– Inspect your home annually for cracks, peeling areas, or bubbling spots.
– Clean exterior surfaces regularly using mild soap and water to remove dirt buildup and mildew.
– Repair any caulking issues around doors and windows promptly.
– Consider applying high-quality paints with UV protection for longer durability.
By staying vigilant about these warning signs and addressing them promptly through repainting projects, homeowners can ensure their property remains both beautiful and well-protected over time.
Five Key Factors That Affect the Lifespan of Exterior Paint
Understanding the factors that influence the lifespan of your home’s exterior paint can help you make informed decisions, ensuring long-lasting beauty and protection.
1.Quality of Paint Used
The type and quality of paint play a significant role in determining how long your exterior paint lasts. Opting for high-quality, durable exterior paints may save you money in the long run by increasing longevity and reducing repainting frequency.
- Acrylic Paints: Known for their durability, resistance to cracking, and ability to withstand weather extremes.
- Oil-Based Paints: Though less common today, they provide a durable finish but require longer drying times.
- Environmentally Friendly Options: Many modern paints are eco-friendly without compromising performance.
| Type of Paint | Durability | Best For |
| Acrylic Paint | High | Most climates |
| Oil-Based Paint | Moderate to High | Humid or rainy areas |
| Eco-Friendly Paints | Moderate | Eco-conscious homeowners |
2.Preparation and Application Techniques
Proper surface preparation and application techniques directly impact how well the paint adheres to surfaces. Without adequate prep work, even high-quality paint can fail prematurely.
Key preparation practices include:
– Cleaning surfaces thoroughly to remove dirt, grime, and mildew.
– Repairing cracks or damaged areas before painting.
– Applying primer where necessary to ensure better adhesion and uniform color.
Application techniques matter as well:
– Using the correct number of coats (typically two) for optimal coverage.
– Avoiding over-thinning paint during application.
– Selecting brushes or rollers suited for the surface texture.
3.Weather Conditions
Environmental conditions during painting significantly affect both immediate results and long-term durability. Painting under suboptimal weather can lead to poor adhesion, cracking, or peeling.
Consider these weather factors:
– Ideal Temperature Range: Most paints perform best between 50°F (10°C) and 90°F (32°C).
– Humidity Levels: Avoid painting during high humidity as it slows drying time.
– Rain Forecast: Rain shortly after painting can wash away fresh paint layers.
4.Exposure to Sunlight
UV radiation from direct sunlight gradually breaks down paint pigments and binders over time. Homes with southern or western exposure often experience faster fading or chalking due to heightened sun exposure.
Mitigation tips:
– Use UV-resistant paints designed for exterior use.
– Consider lighter colors that reflect sunlight rather than absorbing it.
Additionally, applying a protective coating may further shield painted surfaces from UV damage.
5.Maintenance Practices
Regular maintenance extends the life expectancy of exterior paint by addressing wear-and-tear issues promptly before they worsen.
Effective maintenance includes:
– Cleaning painted surfaces annually with mild soap and water to remove dirt or mold buildup.
– Inspecting for signs of chipping, blistering, or peeling every few months.
– Touch-ups on small areas showing wear instead of waiting for widespread damage.
| Maintenance Task | Frequency |
| Washing Exterior Walls | Annually |
| Inspecting For Damage | Every 6 Months |
| Completing Touch-Up Work | As Needed |
By focusing on these five key factors—paint quality, preparation/application methods, environmental conditions, sunlight exposure, and maintenance—you can maximize the lifespan of your home’s exterior paint while preserving its aesthetic appeal for years to come.
When Is the Best Time of Year to Paint Your Home’s Exterior for Optimal Results
Painting the exterior of your home is a significant project that requires careful planning. One of the most important aspects to consider is timing. Selecting the right time of year to complete this task can directly impact the quality, longevity, and appearance of your paint job. Factors such as weather conditions, temperature, and humidity play a critical role in ensuring optimal results. Below is a detailed guide to help you determine when it’s best to paint your home’s exterior.
Key Weather Conditions for Exterior Painting

Ideal weather conditions are essential for achieving a durable and smooth finish.
- Temperatures between 50°F (10°C) and 85°F (29°C)are considered ideal for most exterior paints.
- Avoid painting during extreme heat or cold as it can affect paint adhesion and drying time.
- Aim for humidity levels between 40% and 70%. High humidity can slow down drying times and lead to blistering or uneven finishes.
- Ensure there is no rain in the forecast for at least 24–48 hours before and after painting.
- Wet surfaces prevent proper paint adhesion, which can compromise durability.
Regional Considerations
- Late spring through early fall offers mild temperatures with lower chances of precipitation.
- Early spring or late fall works best when temperatures are cooler, avoiding the intense summer heat.
- Higher humidity levels near coastal regions mean monitoring weather patterns more closely. Aim for sunny days with moderate humidity.
Seasonal Breakdown
| Season | Pros | Cons |
| Spring | Moderate temperatures; minimal rain | Unpredictable weather in some regions |
| Summer | Longer daylight; consistent warm weather | High heat may cause quick drying |
| Fall | Cooler temperatures; stable weather | Shorter days reduce working hours |
| Winter | Lower demand for contractors | Cold can prevent proper curing |
Tips for Planning Your Painting Project
- Monitor Local Weather Reports: Regularly check forecasts leading up to your project to avoid unexpected delays caused by rain or extreme conditions.
- Prepare in Advance: Clean surfaces thoroughly, repair damage, and apply a primer (if necessary) well ahead of planned painting dates.
- Work During Peak Hours: Paint during mid-morning or late afternoon when temperatures are stable—not too cold or hot.
- Select Quality Paints: Use exterior-grade paints designed to withstand fluctuating climates for added durability.
By choosing the right time of year that aligns with optimal conditions, you’ll enhance not only the aesthetic appeal but also the longevity of your home’s exterior finish. Proper timing ensures that your hard work yields professional results that stand up against environmental challenges over time.
The Ultimate Guide to Painting Your Exterior Door: Tips and Techniques
Painting your exterior door is one of the most effective ways to enhance your home’s curb appeal. Not only does it refresh the appearance of your entryway, but it also provides essential protection against weather and wear. To ensure a professional finish that lasts, it’s important to follow proper techniques and use the right materials. This guide covers everything you need to know about painting your exterior door.
Preparing Your Door for Painting
- Remove Hardware: Unscrew the doorknob, lockset, and any decorative hardware.
- For wooden doors: Use 120-150 grit sandpaper.
- For metal doors: Opt for fine-grit sandpaper (180-220 grit) to prevent scratches.
- Repair Imperfections: Fill dents or cracks with wood filler or metal putty as needed. Sand once dry for a seamless surface.
- Mask Off Edges: Apply painter’s tape around windows, hinges, and other areas you don’t want painted.
Choosing the Right Paint
Selecting the appropriate paint ensures durability and an attractive finish.
- Acrylic Latex Paint: Ideal for most climates due to its flexibility and UV resistance.
- Oil-Based Paint: Best for high-traffic areas as it is more resistant to wear but may yellow over time.
- High Gloss: Reflects light beautifully but highlights imperfections.
- Semi-Gloss: Strikes a balance between durability and hiding flaws.
| Finish Type | Durability | Appearance |
| High Gloss | Very Durable | Reflective & Modern |
| Semi-Gloss | Durable | Sophisticated & Subtle |
| Satin | Moderate | Soft & Muted |
Painting Techniques for Best Results
- Apply primer if switching from dark to light colors or painting bare wood/metal.
- Allow primer to dry completely before proceeding.
- Opt for high-quality brushes (2”-3” angled brushes work well) or foam rollers designed for doors.
- For spray paint applications, maintain consistent motion at an appropriate distance (10-12 inches).
- Avoid thick layers of paint that lead to drips or uneven drying.
- Paint in smooth strokes along the grain if painting wood.
- Allow Drying Time Between Coats: Check your paint label’s recommended drying time before applying additional layers.
Finishing Touches
- Remove painter’s tape carefully while the final coat is still slightly wet to prevent peeling.
- Reattach hardware like doorknobs or locks only after ensuring that all layers are fully cured (usually 24-48 hours).
- Clean up edges with a razor blade if necessary for sharp lines around glass panels.
Maintenance Tips
- Clean regularly with mild soap and water to remove dirt buildup.
- Inspect annually for chips or cracks in the paint; touch-up as needed using leftover color-matched paint.
By following these tips and techniques, you can transform your exterior door into a centerpiece that enhances both aesthetic appeal and functionality while standing strong against daily wear-and-tear over time.
Everything You Need to Know About Restaining and Refinishing Wood Siding
Wood siding is a durable and attractive option for homes, but it requires regular maintenance to preserve its beauty and protect it from the elements. Restraining and refinishing wood siding is a necessary process that not only enhances its appearance but also extends the life of the material. Below, we will cover the key aspects of restraining and refinishing wood siding, including preparation steps, techniques, and tips to achieve professional results.
Why Restain and Refinish Wood Siding?
Over time, exposure to sun, rain, wind, and temperature fluctuations can cause wood siding to deteriorate or lose its luster.
- Protection: A new stain or finish acts as a protective barrier against moisture damage, rot, UV rays, mold growth, and pests.
- Enhanced Appearance: Refinishing brings out the natural beauty of the wood grain while adding rich color or texture.
- Increased Longevity: Regular maintenance extends the lifespan of your wood siding by several years.
- Improved Property Value: Well-maintained siding boosts curb appeal and can increase resale value.
Signs It’s Time to Restain or Refinish
Knowing when to refinish your wood siding is critical for effective upkeep.
- Fading or discoloration due to prolonged sun exposure.
- Peeling or flaking stain/paint layers.
- Visible cracks in the finish allowing water penetration.
- Mold or mildew spots on the surface of your siding.
- A chalky residue when running a hand over the surface.
If you notice these issues, it’s time to plan for restaining or refinishing before further damage occurs.
Essential Tools & Materials
| Tools | Materials |
| Power washer | Exterior-grade wood stain |
| Scrapers | Wood cleaner/brightener |
| Sandpaper (80–120 grit) | Sealant (if applicable) |
| Paint brushes | Primer (if necessary) |
| Rollers | Drop cloths |
Preparation Steps
- Inspect Your Siding
Check for loose boards, rot spots, cracks, or other structural issues. Address repairs before moving forward with staining. - Clean Thoroughly
Use a power washer combined with a wood cleaner or brightener solution.
Transform Your Log Cabin with Dark Stains: Comprehensive Guide to Enhancing Its Appeal
Dark stains can dramatically transform the aesthetic of a log cabin, giving it a modern, sophisticated, or rustic charm while also protecting the wood from environmental damage. Choosing the right stain and applying it correctly can make a significant difference in both appearance and durability. This guide explores essential tips, techniques, and considerations for using dark stains on your log cabin.
Benefits of Dark Stains for Log Cabins
Opting for dark stains offers several advantages that go beyond aesthetics.
- Enhanced Visual Appeal: Dark stains create a bold yet timeless look that complements natural surroundings.
- UV Protection: High-quality dark stains often include pigments that protect against harmful UV rays.
- Improved Longevity: They provide better coverage, reducing wear and tear from harsh weather conditions.
- Concealing Imperfections: Darker tones can mask minor imperfections in the wood’s surface.
- Boosted Curb Appeal: A modern or refined exterior can increase your property’s value.
Choosing the Right Dark Stain
- Oil-Based: Penetrates deeply into the wood, highlighting its natural grain while offering superior protection.
- Water-Based: Dries quickly and is eco-friendlier but may require more frequent reapplication.
- Transparent or Semi-transparent: Allows the wood grain to show through while offering subtle darkening.
- Solid: Offers maximum coverage and hides imperfections completely.
- Popular shades include espresso brown, charcoal black, deep chestnut, and rich mahogany.
- Ensure the stain you choose is formulated to withstand local climatic conditions such as heavy rain or intense sunlight.
Preparing Your Cabin for Staining
Proper preparation ensures the stain adheres well and lasts longer.
- Remove dirt, mold, and mildew using a wood cleaner or pressure washer (on low settings).
- Smooth out splinters or uneven spots with sandpaper for a uniform finish.
- Fill cracks with caulk suitable for logs and replace any severely damaged sections.
- Avoid staining during extreme temperatures (below 50°F or above 85°F) or rainy days.
Applying Dark Stain Effectively
- Use a high-quality brush designed for heavy-duty stains or consider sprayers for large surfaces.
- Apply stain in thin layers to prevent streaks or blotches.
- Work in sections to maintain consistency across surfaces.
- Allow each coat to dry fully before applying additional layers (refer to manufacturer instructions).
| Step | Tool/Material Needed | Purpose |
| Cleaning | Wood cleaner/pressure washer | Prepares surface by removing debris |
| Sanding | Sandpaper (60–80 grit) | Ensures smooth application |
| Application | Brush/sprayer | Provides even distribution of stain |
Maintaining Your Log Cabin’s Finish
- Inspect annually for fading or peeling areas that may require touch-ups.
- Reapply stain every 3–5 years depending on exposure to sunlight and weather conditions.
- Clean periodically using mild soap and water to remove dirt build-up.
Dark staining is one of the most effective ways to revitalize your log cabin’s exterior while adding personality and protection at once. When done thoughtfully with preparation and care, it enhances both beauty and durability seamlessly over time.
- Expert Insights on Interior vs Exterior Painting from a Leading Painting Company Florida
- How Florida painters Recommend Painting Your House and Inspiring Wall Ideas
- How Often Should Florida Painters Repaint Your Home’s Exterior for Long-Lasting Beauty
- How Often Should House Painters Florida Recommend Repainting Your House Exterior for Lasting Beauty
- How Often Should Florida Painters Repaint Your Home for Optimal Aesthetic and Protection
- How Often Should Florida Painters Repaint the Exterior of Your Home and Why It Matters
- How Often Should You Repaint Your Home with a Painting Company Florida to Keep It Looking Fresh and Beautiful
- Finding the Right Painting Company Florida for a Stunning Interior Transformation
- Room-by-Room Guide: How Florida Painters Recommend Repainting Your House Interior
How Often Should House Painters Florida Recommend Repainting Your House Exterior for Lasting Beauty
Maintaining the exterior of your home is an essential part of preserving its curb appeal and protecting it from environmental damage. Knowing how often to repaint your house exterior can save you time, money, and unnecessary stress down the line. Several factors influence the frequency of repainting, including the type of surface material, climate, and quality of previous paintwork. Below, we’ll explore these factors in detail and provide actionable advice for keeping your home’s exterior looking its best.
Factors That Determine Repainting Frequency
- Surface Material
Different building materials weather differently over time. - Wood Siding: Typically requires repainting every 3-7 years due to its vulnerability to moisture and sunlight damage.
- Stucco: Holds up longer with proper maintenance—repainting is often needed every 5-10 years.
- Brick: Painted brick can last 15-20 years if done with high-quality masonry paint.
- Vinyl Siding: Does not require as frequent painting; typically every 10-20 years or even longer with proper care.
- Climate Conditions
The weather plays a significant role in determining how long exterior paint will last: - Homes exposed to extreme sun (e. g. , desert climates) may experience faster paint fading and chalking, requiring more frequent repaints (every 3-5 years).
- In coastal areas where salt air causes erosion, repainting may be necessary every 2-5 years to ensure protection against corrosion.
- Regions with moderate climates may allow paint to last closer to its maximum lifespan.
- Quality of Paint and Preparation
The longevity of exterior paint depends heavily on the quality of materials used during application and the extent of surface preparation: - High-quality acrylic paints tend to outlast oil-based alternatives due to their flexibility and resistance to cracking over time.
- Proper preparation—such as cleaning surfaces thoroughly, repairing damage (e. g. , rotten wood or cracks), sanding, priming, and sealing—is critical for a lasting finish.
Signs It’s Time to Repaint
Even if you’re within the expected lifespan for your current paint job, certain visible signs indicate it might be time for a refresh:
– Peeling or cracking paint
– Fading color or dullness
– Growth of mildew or mold
– Warping or wood rot underneath painted surfaces
– Bubbling or blistering due to trapped moisture
Tips for Extending Paint Life
To ensure your house stays beautiful while reducing overall maintenance needs:
1. Clean the exterior regularly (at least once a year) using mild detergent and water.
2. Trim surrounding trees and plants that could trap moisture against walls.
3. Inspect annually for small cracks or chips—patch these promptly before they worsen.
4. Choose high-quality paints designed specifically for your region’s climate.
5. Consider UV-resistant finishes if you live in areas prone to intense sunlight exposure.
Table: General Repainting Timeline by Material
| Surface Material | Expected Lifespan Before Repainting |
| Wood Siding | 3–7 years |
| Stucco | 5–10 years |
| Brick | 15–20 years |
| Vinyl Siding | 10–20+ years |
Understanding when and how often you should repaint your house can make all the difference in preserving its beauty while protecting it from wear-and-tear caused by nature’s elements over time. By focusing on regular maintenance, strategic material choices, and quality workmanship at the outset, you’ll not only extend the life of your home’s exterior but also enhance its overall value over decades ahead.
The Complete Guide to Hiring Florida Painters for Your Exterior Painting Needs
Hiring a professional exterior painter can save you time, ensure quality results, and protect your home from unnecessary damage. However, selecting the right painter requires research and preparation. This guide outlines the steps, factors to consider, and questions to ask before making your decision.
Advantages of Choosing Professional Painting Services Florida
- Expertise and Experience: Professionals have the skills to handle various surfaces and techniques effectively.
- Time-Saving: Painting an entire house exterior can take weeks for an amateur but only days for experienced painters.
- High-Quality Results: A professional ensures even application, proper coverage, and long-lasting finishes.
- Access to Tools: They bring specialized tools like sprayers, ladders, and safety equipment that improve efficiency.
Steps to Hire the Right Interior & Exterior Painting Florida Expert
- Determine which surfaces need painting (e. g. , siding, trims, doors).
- Consider if additional services like surface preparation or minor repairs are required.
- Start by seeking recommendations from friends or family.
- Read online reviews on trusted platforms such as Google Reviews or Yelp.
- Contact at least three painters for quotes to compare pricing and services offered.
- Avoid choosing solely based on the lowest price; balance cost with quality.
- Ensure they have valid licenses (if applicable in your area).
- Confirm their insurance covers liability and worker’s compensation in case of accidents.
- Ask Key Questions Below are essential questions you should ask during consultations:
| Question | What You Learn |
| How many years of experience do you have? | Their level of expertise |
| Can you provide references? | Insights into past work |
| What type of paint do you recommend? | Understanding materials used |
| Do you offer warranties? | Confidence in their service quality |
- Review Contract Details Before signing any agreement:
- Look for specifics about timelines, costs, materials, and warranties.
- Clarify payment terms (e. g. , deposit amounts).
Red Flags During the Hiring Process
- Lack of proper insurance or licenses
- Vague or incomplete contracts
- Reluctance to provide references or examples of previous work
- Quotes that seem significantly lower than others (could indicate cutting corners)
How Much Does It Cost?
| Factor | Range ($) |
| Size of your home | Larger homes require more labor/materials |
| Type/quality of paint | Premium paints increase costs |
| Surface preparation needed | Additional cleaning/repairs may add fees |
On average, expect to spend between $3,000-$7,000 for painting a standard-sized home in 2025.
Hiring the right professional exterior painter takes careful consideration but is worth the effort for achieving excellent results that enhance your home’s curb appeal while protecting it from weathering factors over time.
Understanding How Long Exterior Paint Can Truly Last
Exterior paint serves as both protection and an aesthetic enhancement for your home, but how long it truly lasts depends on several factors. With proper maintenance and high-quality products, a well-applied coat of exterior paint can last for years. However, environmental conditions, the type of paint used, and the quality of application can all impact its lifespan. Let’s explore the key elements that determine how long exterior paint will endure.
- Type of Surface Material:
Different surfaces hold paint differently.
| Surface Material | Approximate Lifespan | |——————–|———————–| | Wood Siding | 3–7 years | | Stucco | 5–10 years | | Brick | Up to 15 years | | Fiber Cement | Up to 10–15 years | - Areas with extreme heat or cold may cause paint to crack or fade more quickly.
- Humid climates can lead to mildew or mold growth on painted surfaces.
- Coastal regions face additional challenges due to salt air corrosion.
- Quality of Paint:
Using high-quality, weather-resistant paints ensures better durability compared to cheaper alternatives. - Acrylic latex paints are known for their longevity on most surfaces.
- Oil-based paints offer good durability but may chip faster in fluctuating conditions.
- Level of Maintenance:
Regular maintenance prolongs the life of exterior paint by preventing small issues from worsening over time: - Keep gutters clean to avoid water stains.
- Power wash dirt and debris periodically.
- Address peeling or chipping areas immediately.
When choosing a type of paint, understanding its longevity is essential.
| Paint Type | Typical Lifespan |
| Acrylic Latex | Up to 10 years |
| Oil-Based | Around 5–8 years |
| Elastomeric Coating* | Up to 20+ years |
*Note: Elastomeric coatings are often used in areas requiring high durability against moisture or extreme weather conditions.
Even with proper care, your home’s exterior will eventually need repainting.
- Fading Colors: Indicates UV damage over time.
- Cracking or Peeling: Signals that moisture has penetrated the surface.
- Blistering: Caused by trapped moisture beneath the paint layer.
- Chalking: A powdery residue appearing on painted surfaces due to weather exposure.
Tips for Extending the Life of Your Exterior Paint
- Invest in top-tier paints designed specifically for exteriors and suited for your local climate.
- Ensure proper surface preparation before painting (e. g. , removing old paint, sanding rough spots).
- Apply primer as needed for better adhesion and coverage.
- Choose lighter shades, as they reflect sunlight better than darker tones.
- Schedule periodic inspections every year or two to identify early signs of wear or damage.
By considering these factors and implementing best practices, you can help ensure your home’s exterior remains beautiful longer while protecting underlying materials from damage caused by weather and aging processes.
Step-by-Step Tips on How to Paint Weatherboards Like a Pro
Painting weatherboards is a task that, when done correctly, can significantly enhance your home’s appearance and protect it from the elements. Achieving a professional finish requires proper preparation, the right tools, and attention to detail. Follow these step-by-step tips to ensure a flawless outcome.
Before you even think about applying paint, thorough preparation is essential for achieving long-lasting results.
- Clean the Surface:
Dirt, mildew, and old paint can prevent proper adhesion. Use a pressure washer or scrub by hand with soapy water to clean the weatherboards thoroughly. Rinse and allow them to dry completely. - Inspect for Damage:
Check for any cracks, rot, or damaged boards. Replace boards that are too far gone and repair minor damage with an appropriate filler. - Sand the Surface:
Sanding smooths out uneven areas and removes any loose paint. Opt for medium-grit sandpaper (around 120–150 grit) for this task. - Mask Off Areas:
Use painter’s tape to protect windows, doors, trims, and other areas you don’t want painted. Cover plants or nearby surfaces with drop cloths or plastic sheeting.
The tools and materials you use will directly impact the quality of your work.
- Paint Type:
For weatherboards, opt for high-quality exterior-grade acrylic paint as it provides excellent durability in varying weather conditions. - Brushes and Rollers:
Use angled brushes for edges and hard-to-reach spots while reserving rollers for large flat surfaces. - Primer:
If painting raw wood or heavily sanded boards, always apply an appropriate primer first to seal and protect the surface before applying topcoats.
| Tool/Material | Purpose |
| Paint Scraper | Removing loose paint |
| Medium-Grit Sandpaper | Smoothing out surfaces |
| Painter’s Tape | Masking off non-painted areas |
| Acrylic Exterior Paint | Long-lasting protection |
Priming ensures better paint adhesion and creates a uniform surface.
- Start by applying primer with a brush along edges.
- Cover larger sections with a roller.
- Allow sufficient drying time as per manufacturer instructions (typically at least 24 hours).
Now comes the most visible part of the process: applying paint to your weatherboards.
- Start at the Top: Always begin painting from the top of the wall downward to avoid drips ruining sections you’ve already completed.
- Follow Grain Direction: Brush strokes should follow along with the direction of your weatherboard’s grain (horizontal strokes for horizontal boards).
- Thin Coats Are Better than One Thick Coat: Apply two or three thin coats instead of one thick coat for even coverage.
- Use Quality Brushes/Rollers: Cheap tools can leave streaks or lint behind on your surface.
- Let each coat dry completely before applying another layer.
- Remove painter’s tape carefully while paint is still slightly wet to avoid peeling.
- Inspect for missed spots or uneven coverage; touch up where needed using small brushes.
- Dispose of used materials responsibly according to local waste regulations.
Important Tips

- Avoid painting in extreme temperatures (above 85°F/29°C or below 50°F/10°C) as it can affect drying times.
- Schedule your project during dry weather conditions since rain can ruin fresh paint.
- Wear protective gear such as gloves and safety glasses during sanding or when dealing with chemicals like primers.
By following these detailed steps carefully, you’ll achieve professional-grade results that beautify your home’s exterior while protecting it against harsh outdoor elements over time—turning tedious tasks into rewarding accomplishments without unnecessary stress risks/errors common among beginners alike
What You Need to Know Before Painting a Concrete Driveway for the Best Results
Painting a concrete driveway can significantly enhance its visual appeal, protect it from wear and tear, and increase its lifespan. However, achieving a durable and professional finish requires careful preparation, the right materials, and proper application techniques. Below is a comprehensive guide on what you need to know before starting this project.
Benefits of Painting a Concrete Driveway
- Improved Aesthetics: Add color or patterns to complement your home’s exterior.
- Protection Against Elements: Shields the surface from UV rays, moisture, oil stains, and mildew.
- Increased Durability: Strong paint coatings can reduce cracking and surface damage over time.
- Cost-Effective Makeover: A fresh coat of paint is an affordable way to revamp your driveway without a full replacement.
Preparation is Key
Proper preparation ensures that the paint adheres well to the concrete surface.
- Sweep away debris, dirt, and leaves.
- Use a pressure washer to remove grime or grease stains.
- For stubborn stains like oil or rust, use degreasers or specialized cleaners.
- Inspect for cracks or holes on the driveway’s surface.
- Fill smaller cracks with concrete filler and larger holes with patching compound.
- Allow repairs to cure fully before proceeding.
- Etching opens up pores in the concrete for better paint adhesion.
- Use an etching solution (typically acid-based) following manufacturer instructions.
- Rinse thoroughly and let it dry completely.
- Moisture trapped in concrete can prevent proper bonding of paint layers.
- Wait 24–48 hours after washing or rain before painting.
Choosing the Right Paint
Not all paints are suitable for outdoor concrete surfaces.
| Paint Type | Features |
| Epoxy Paint | Highly durable; resistant to heavy traffic & chemicals |
| Acrylic Latex Paint | Budget-friendly; offers good UV resistance |
| Polyurethane Coating | Ideal for high-performance protection; long-lasting |
Application Tips for Best Results
- Use rollers with long handles for even coverage on large areas.
- For edges or tight corners, apply with brushes.
- A quality primer increases adhesion between the surface and paint layer.
- Allow adequate drying time based on product guidelines.
- Multiple thin coats ensure better durability compared to one thick coat.
- Wait 24 hours between coats for proper curing.
- Seal It Off: After painting is complete, apply a clear sealer to protect against fading, peeling, or weather-related damage.
Maintenance After Painting
- Avoid parking heavy vehicles on it immediately after painting; wait at least seven days.
- Regularly clean dirt or debris using mild soap and water instead of harsh chemicals.
- Reapply sealer every 2–3 years to keep it looking fresh.
By following these best practices and investing in quality materials, you can ensure that your painted concrete driveway remains attractive and durable over time while withstanding daily use effectively.
Finding the Best Painting Company Florida: Cost to Paint Your Home’s Exterior in 2025
Painting the exterior of your house is an excellent way to enhance its curb appeal, protect it from environmental damage, and increase its value. However, understanding the costs involved is essential for budgeting effectively. Below is a comprehensive breakdown of the factors influencing the cost to paint your home’s exterior in 2025.
Factors That Affect Exterior Painting Costs
Several variables determine the overall cost of painting your home’s exterior.
- Larger homes require more paint and labor, which increases costs.
- Example: A small single-story house may cost $2,000–$4,000, while a large two-story home could cost $6,000 or more.
- Surfaces like wood, stucco, or brick can influence pricing.
- Wood siding often requires more prep work and primer.
- Stucco may need patching before painting.
- If your home has peeling paint or other damage, expect additional prep costs.
- Higher-quality paints are more durable but come at a premium price.
- Budget-grade: $20–$40
- Mid-range: $50–$70
- Premium-grade: $80+
- Professional painters charge by square footage or per hour.
- Per square foot: $1.
- Per hour: $25–$75
- Labor rates vary based on where you live. Urban areas with higher living costs typically have higher painting service fees.
- Additional Features Additional work around trims, shutters, doors, and gutters can add to overall expenses: | Feature | Estimated Cost Range | |————————–|———————-| | Window Trim (per unit) | $50–$150 | | Doors | $100–$300 | | Eaves/Gutters | $200–$600 |
Cost Breakdown Table
| Factor | Estimated Cost Range |
| Paint (materials) | $500–$1,500 |
| Labor (professional painters) | $1,500–$6,000 |
| Prep Work (repairs/cleaning) | $200–$800 |
| Equipment Rental/Tools | $100–$300 |
Total Estimated Costs:
– Small house (1 story): ~$2,000-$5,000
– Medium house (2 stories): ~$3,500-$7,500
– Large house (>2 stories): ~$8,000+
Tips to Save on Exterior Painting Costs
- DIY for Simple Tasks: Consider handling basic prep tasks like cleaning surfaces or patching minor cracks yourself.
- Plan Around Off-Seasons: Painters tend to offer discounts during colder months when demand is lower.
- Get Multiple Quotes: Obtain at least three quotes from reputable contractors to find competitive pricing.
- Use High-Durability Paints: Spending more upfront on quality paints can save you money in the long run by extending the time between repaints.
Painting your home’s exterior is an investment that pays off visually and functionally when done correctly. By understanding all aspects of pricing in 2025 and taking steps to plan carefully, homeowners can ensure they get value without going over budget.
Top Factors to Consider When Choosing Trusted Exterior Painters
When it comes to maintaining the curb appeal and longevity of your home, selecting a trusted exterior painter is an essential decision. A high-quality paint job not only enhances the appearance of your property but also provides protection against harsh weather conditions, moisture, and other environmental factors. Below are the top factors you should consider when choosing a reliable and experienced exterior painter.
One of the first steps in finding a trusted exterior painter is ensuring they have the proper credentials.
– Hold valid licenses required by your state or local authorities.
– Have liability insurance to cover any potential damages during the project.
– Are part of reputable trade organizations or associations, like the Painting Contractors Association (PCA).
Tip: Ask for proof of these credentials before hiring anyone to avoid potential risks or subpar work.
Not all painters have expertise in exterior painting.
– Look for professionals with at least 5–10 years of experience in residential or commercial exterior painting.
– Inquire about their knowledge of weather-resistant paints that suit your region’s climate conditions.
Experience often translates into better quality results, fewer mistakes, and more efficient workmanship.
Reliable painters should be able to provide references from recent projects they’ve completed.
– Look up online reviews on platforms like Google, Yelp, or Houzz to gauge customer satisfaction.
– Reach out directly to previous clients if possible and ask questions about their overall experience.
Red flags: Be cautious if reviews consistently mention poor communication, missed deadlines, or unsatisfactory results.
A well-documented portfolio showcases a painter’s capabilities and style consistency.
| Important Aspects | What to Look For |
|——————–|——————|
| Surface Preparation | Before-and-after photos highlighting proper cleaning/priming techniques |
| Finish Quality | Smooth application without visible streaks or uneven textures |
| Attention to Detail | Neatly painted edges around windows/doors with no overspray issues |
Seeing evidence of high standards assures you that they’ll deliver professional results.
Ask for written estimates from multiple painters before making a decision.
– Labor costs (broken down by hours/days).
– Material costs (type/brand of paint).
– Additional expenses (e. g. , scaffolding rental).
Avoid vague pricing structures that might lead to hidden charges later on.
Reputable painters stand behind their work by offering warranties that cover labor defects or premature peeling/fading over time.
– Duration – Most warranties range between 2–5 years depending on workmanship quality.
– Exclusions – Understand what scenarios could void your warranty (e. g. , improper maintenance).
Having this protection ensures peace of mind long after the project is completed.
Clear communication is key throughout the entire painting process:
– Do they provide regular updates on progress?
– Are they receptive to questions/concerns?
Additionally, assess how professional their team appears—punctuality, clean uniforms/tools—and whether they leave a tidy workspace after finishing each day’s task.
By carefully evaluating these factors, you can ensure you’re hiring an experienced exterior painter who delivers exceptional results while prioritizing customer satisfaction.
Top Factors to Consider When Choosing Trusted Exterior Painters
Selecting the right exterior painters for your home can make a significant difference in both the appearance and longevity of your property’s exterior. With countless options available, it’s essential to evaluate professionals carefully to ensure you get the best service.
Key points to check:
– State or local licenses (if required in your area).
– General liability insurance coverage.
– Workers’ compensation insurance for safety compliance.
Experienced painters are better equipped to handle challenges like weather damage, surface imperfections, or unique architectural features.
Questions to ask:
– How long have they been providing painting services?
– Have they worked on similar types of houses or materials?
– Do they have expertise with specific paint brands or environmentally friendly products?
Reliable painters often come highly recommended by past clients.
What to look for in reviews:
– Positive comments about professionalism, punctuality, and quality of work.
– Mention of how well the painters addressed any problems during the project.
A professional painter will take preparation seriously, as it directly impacts the final results and durability of the paint job.
Preparation steps a trusted painter should follow:
– Cleaning surfaces thoroughly (e. g. , pressure washing).
– Fixing cracks, sanding rough areas, and replacing damaged materials if needed.
– Applying appropriate primers before painting.
Request detailed quotes from at least three different professionals before making a decision. Be wary of estimates that seem unusually low—they may indicate subpar materials or shortcuts during the process.
Factors that should be included in an estimate:
| Aspect | Details Expected |
|———————-|———————————|
| Paint Quality | Specific brands/types mentioned.
| Labor Costs | Breakdown of hourly/daily rates.
| Timeline | Estimated start and end dates.
| Cleanup Procedures | Assurance that waste will be cleared.
Trusted professionals typically offer warranties as proof of their confidence in their work quality.
Good warranties should cover:
– Peeling or blistering paint within a specified period (e. g., two years).
– Repairs caused by improper application techniques. Ensure you receive warranty details in writing for clarity.
Clear communication is vital throughout any home improvement project. Choose painters who respond promptly to inquiries, provide clear explanations regarding their process, and keep you updated during every stage of the job.
Indicators of good communication:
– Transparent answers regarding costs or challenges.
– Willingness to address your design preferences.
By considering these factors thoughtfully when choosing an exterior painter, you’ll be better equipped to hire a professional who delivers high-quality results while meeting your expectations effectively.
- Expert Insights on Interior vs Exterior Painting from a Leading Painting Company Florida
- How Florida painters Recommend Painting Your House and Inspiring Wall Ideas
- How Often Should Florida Painters Repaint Your Home’s Exterior for Long-Lasting Beauty
- How Often Should House Painters Florida Recommend Repainting Your House Exterior for Lasting Beauty
- How Often Should Florida Painters Repaint Your Home for Optimal Aesthetic and Protection
- How Often Should Florida Painters Repaint the Exterior of Your Home and Why It Matters
- How Often Should You Repaint Your Home with a Painting Company Florida to Keep It Looking Fresh and Beautiful
- Finding the Right Painting Company Florida for a Stunning Interior Transformation
- Room-by-Room Guide: How Florida Painters Recommend Repainting Your House Interior
How Often Should Florida Painters Repaint Your Home for Optimal Aesthetic and Protection

Repainting your home is not just about maintaining its visual appeal; it also plays a critical role in protecting your property from environmental damage. Below is a detailed look at how often you should repaint various areas of your home and why regular maintenance is essential.
Exterior Painting: Factors to Consider
The exterior of your house faces constant exposure to harsh weather conditions like UV rays, rain, snow, and humidity. These elements gradually wear down the paint’s protective layer.
- Stucco or Brick: Typically requires repainting every 5-7 years due to its porous nature.
- Wood Siding: Needs more frequent care, with painting recommended every 3-5 years.
- Aluminum or Vinyl Siding: Can last longer, often requiring repainting every 7-10 years.
- Fiber Cement: Durable and may only need repainting every 10-15 years.
- Homes in hot or humid regions may require more frequent painting due to faster paint degradation.
- Coastal areas are particularly susceptible to salt damage, necessitating shorter intervals.
- Walls exposed to direct sunlight fade faster than shaded areas.
- Windy regions can cause abrasions that wear down paint over time.
Interior Painting: Room-by-Room Guidelines
Interior spaces generally experience less wear and tear compared to exteriors but still require attention depending on usage patterns and aesthetic preferences.
| Area/Room | Recommended Timeframe |
| High-Traffic Areas (Hallways) | Every 2-3 years |
| Bedrooms (Adults) | Every 5+ years |
| Bedrooms (Children) | Every 2-3 years (due to higher activity) |
| Kitchens & Bathrooms | Every 3-4 years (due to moisture/grease) |
| Ceilings | Every 10+ years unless stained |
Signs That Indicate It’s Time to Repaint
- Fading Colors: Sunlight causes colors to lose vibrancy over time.
- Peeling or Cracking Paint: Indicates exposure-related damage or poor adhesion.
- Mold or Mildew Growth: Common in damp environments such as bathrooms or basements.
- Outdated Colors: Simply evolving tastes may prompt an update.
Benefits of Regular Repainting
- Protection Against Damage: Fresh layers of high-quality paint create a barrier against environmental wear and water infiltration.
- Improved Value: A well-maintained exterior boosts curb appeal and resale value.
- Enhanced Air Quality: Modern paints with low-VOC formulations can improve indoor air quality by reducing chemical exposure.
With proper planning and awareness of these factors, homeowners can ensure their spaces remain both visually appealing and structurally sound for years to come by committing to timely repainting schedules tailored specifically for their needs.
The Ultimate Guide to Choosing a Painting Company Florida Homeowners Can Trust
Repainting your home is one of the most effective ways to revitalize its aesthetics and protect its structure. Whether you’re looking to refresh your interior or safeguard your exterior, repainting requires careful planning, preparation, and execution. This guide walks you through everything you need to know about repainting your home.
Why Repainting Matters
- Aesthetic Renewal– Over time, walls and surfaces can lose their vibrancy due to fading, stains, or outdated colors. A fresh coat of paint rejuvenates the look of your home and brings it up-to-date with current trends.
- Protection from Wear and Tear– Paint acts as a barrier against environmental factors like UV rays, moisture, dirt, and pests that can damage surfaces over time.
Signs It’s Time for a Repaint
Knowing when to repaint is essential for maintaining both appearance and functionality.
- Peeling or Cracking Paint– Indicates age or improper application of previous coats.
- Fading Colors– Caused by prolonged sun exposure or natural aging of paint pigment.
- Stains or Mold Growth– Suggests water damage or poor ventilation in specific areas like bathrooms or basements.
- Outdated Style– If the color scheme no longer matches your taste or current trends.
Interior vs Exterior Repainting: What’s Different?
| Aspect | Interior Painting | Exterior Painting |
| Purpose | Aesthetic improvement; personal style | Curb appeal; protection against elements |
| Frequency | Every 5–7 years (varies by room) | Every 5–10 years (depends on climate) |
| Challenges | Furniture placement; small details | Weather conditions; surface preparation |
Key Considerations for Interior Painting:
- Choose colors that complement furnishings and lighting.
- Use low-VOC (volatile organic compound) paints for better air quality.
- Prioritize high-durability finishes in high-traffic areas like hallways.
Key Considerations for Exterior Painting:
- Opt for weather-resistant paints that withstand temperature fluctuations.
- Focus on proper surface preparation like power washing or sanding.
- Select colors that harmonize with landscaping and neighboring homes.
Steps for a Successful Repaint
- Assessment & Planning: Decide which areas require attention based on signs of wear or changes in design preferences. Evaluate whether professional painters are needed based on project size and complexity.
- Surface Preparation: Clean walls thoroughly, repair cracks/holes, remove old layers if necessary, and sand uneven surfaces for better adhesion.
- Selecting Paints & Tools: Choose high-quality paints suited for the surface type (e. g. , wood vs drywall) along with appropriate brushes, rollers, primers, etc.
- Application Process: Apply primer first (if needed) followed by even coats of paint using proper techniques such as cutting-in edges before rolling broad sections.
- Post-Painting Care: Allow sufficient drying time between coats; inspect finished work closely under different lighting conditions.
Benefits of Professional Painters
- Expertise in color matching and design advice tailored to your space.
- Knowledgeable use of specialized tools ensuring a smooth finish without drips or streaks.
- Efficiency in completing large-scale projects within set timelines.
Investing time into understanding these aspects ensures the repainting process enhances both aesthetics and long-term durability effectively while aligning with personal preferences and budget constraints.
A Comprehensive Guide for House Painters Florida: Everything You Need to Know
Repainting your home is an essential task that not only revitalizes the aesthetic of your living space but also protects surfaces from wear and environmental damage. Whether you’re refreshing the interior, updating the exterior, or tackling both, understanding the repainting process can help you achieve long-lasting and visually appealing results. This guide provides everything you need to know about repainting your home effectively.
Assessing When It’s Time to Repaint
Repainting frequency depends on various factors such as surface type, paint quality, and environmental conditions.
| Surface Type | Recommended Repainting Frequency |
| Interior Walls | Every 3–5 years |
| Ceilings | Every 7–10 years |
| Exterior Surfaces | Every 5–10 years (depending on climate) |
| Trim and Doors | Every 2–3 years |
Signs that it may be time to repaint include:
– Fading or discoloration of paint.
– Peeling, cracking, or bubbling.
– Visible wear in high-traffic areas.
– Stains or damage from water exposure.
Preparing Your Home for Repainting
Proper preparation ensures a durable and professional finish.
- Evaluate Surface Condition: Inspect for cracks, holes, or damages that require repair.
- For interiors: Dust walls and remove grease stains with a gentle detergent solution.
- For exteriors: Pressure wash surfaces to remove dirt, mildew, and debris.
- Patch holes with filler or spackle for interior walls.
- Seal cracks in exterior siding using caulk suitable for outdoor use.
- Sand Surfaces: Sand any uneven areas to create a smooth surface for the paint application.
- Use a primer if switching between drastically different colors or painting over stained areas.
- Priming also helps improve paint adhesion and enhances durability.
Choosing the Right Paints and Tools
Selecting quality materials is crucial for obtaining a flawless result.
Paint Types
– Interior paints:
– Matte finishes are ideal for living rooms and bedrooms as they minimize light reflection.
– Semi-gloss finishes work well in kitchens and bathrooms due to their resistance to moisture.
– Exterior paints:
– Acrylic latex is commonly used due to its durability and weather resistance.
Recommended Tools
– High-quality brushes (angled brushes are great for edges).
– Rollers appropriate for different textures (e. g., smooth rollers for fine finishes; thick-nap rollers for textured walls).
– Painter’s tape to mask edges neatly.
Best Practices During Painting
- Work in natural light whenever possible—this helps you spot imperfections early on.
- Start with ceilings before moving on to walls when painting interiors.
- Always apply multiple thin coats rather than one thick coat; this reduces streaks and improves uniformity.
- Maintain consistent brush strokes or roller techniques across surfaces.
Maintaining Painted Surfaces

After repainting, proper maintenance extends the life of your new coat:
– Dust interior walls regularly with a microfiber cloth to prevent grime buildup.
– Clean exterior surfaces annually by hosing off dirt gently or using mild soapy water where needed.
– Address chips or scratches promptly by touching up affected areas with leftover paint.
By following this comprehensive guide, you can achieve both protective benefits and stunning aesthetics through well-planned home repainting projects while ensuring long-lasting results tailored specifically to your space’s needs.
Professional Painting Services Florida: Exploring the Art and Craft of Decorating
Painting and decorating are not just about applying color to walls or arranging decor. It is a meticulous craft that combines technical skill, creativity, and an understanding of spaces. Professional painting and decorating can transform a bland room into a vibrant haven or give an exterior facade an entirely new personality. Let’s delve into the nuances of this craft.
The Skillset of a Professional Painter and Decorator
Professional painters and decorators bring a variety of skills to the table that go beyond simply painting walls.
- Surface Preparation:
Preparing surfaces is critical for achieving flawless results. This includes cleaning, sanding, filling cracks, repairing imperfections, and priming surfaces to ensure the paint adheres properly. - Paint Application Techniques:
Skilled painters use techniques such as brushing, rolling, or spraying to ensure even coverage without streaks or bubbles. - Knowledge of Materials:
A professional must know which type of paint works best for specific surfaces (e. g. , oil-based vs. latex) and understand how finishes like matte, satin, or gloss can affect aesthetics. - Color Theory Expertise:
Professionals often have knowledge in color theory to help clients select colors that complement their space while evoking the desired mood. - Attention to Detail:
Precision is essential when it comes to tasks like cutting in edges or ensuring clean lines between walls and trim.
Tools Used by Professionals
Professional painters rely on high-quality tools to achieve superior results.
| Tool | Purpose |
| Brushes | For detailed work like corners or intricate designs |
| Rollers | For covering large areas quickly with even coats |
| Drop Cloths | Protect furniture, flooring, or fixtures from paint splatter |
| Tape | Masking tape ensures clean lines along edges or around trim |
| Sandpaper | Smooths surfaces before applying paint |
| Ladders/Scaffolding | Helps reach high ceilings or exterior facades |
Decorating Beyond Painting
Decorating goes hand-in-hand with painting but extends into other elements that enhance the look and feel of a space.
- Hanging wallpapers with precision.
- Adding crown molding or trim for architectural interest.
- Incorporating textures through techniques like sponging or stenciling.
- Arranging decorative elements such as art pieces to complement design themes.
Why Opt for Professional Painters and Decorators?
- Time Efficiency– With experience comes efficiency; professionals can complete projects faster than DIY efforts while maintaining quality.
- Expert Advice– Guidance on colors, patterns, finishes, and styles ensures you make informed decisions tailored to your preferences.
- Durable Results– Proper preparation combined with expert application leads to longer-lasting results that stand up against wear over time.
- Stress Reduction– Professionals manage all aspects of the work from start to finish so you don’t have to worry about minor details.
Final Thoughts on Painting as an Artform
When done well, painting elevates spaces by marrying form with function through thoughtful application techniques paired with carefully chosen hues. The process requires patience, skillful execution, creativity—and above all—a commitment to excellence in every detail.
Whether creating focal points within interiors through bold accent walls or revitalizing aging exteriors for improved curb appeal; professional painting transcends mere functionality by embodying both science & artistry simultaneously within its domain boundaries
Key Factors to Consider for Interior & Exterior Painting Florida Projects
Repainting your home can significantly enhance its appearance and protect it from wear and tear. However, timing and other factors play a critical role in achieving the desired results. Below, we explore essential factors to consider when deciding whether to repaint your home’s interior or exterior.
One of the primary reasons to repaint is the condition of your existing paintwork.
– Peeling, cracking, or bubbling paint
– Fading or discoloration due to sun exposure
– Stains or marks that no longer clean off
– Mold, mildew, or water damage
If these issues are present, it’s likely time for a fresh coat of paint to restore aesthetics and maintain protection.
For exterior painting especially, weather plays a significant role in determining when to repaint:
– Homes in areas with high humidity may face faster deterioration due to moisture damage.
– Ultraviolet (UV) exposure in sunny climates can cause paint colors to fade more quickly.
– Rainy or snowy regions might lead to quicker peeling and cracking of exterior paints.
A general guideline for exteriors is every 5–10 years, but this depends on the quality of previous work and weather exposure.
The type of paint previously used also influences how often you’ll need to repaint:
| Type | Lifespan |
|——————-|———————————-|
| Latex-based Paint | Typically lasts around 7–10 years |
| Oil-based Paint | Often lasts up to 10–15 years |
High-quality paints not only last longer but also provide better protection against environmental elements.
Certain rooms within a home endure more wear-and-tear than others:
– High-traffic areas like hallways may require more frequent painting due to scuff marks and dirt buildup.
– Kitchens and bathrooms are prone to moisture-related issues like stains or mildew on walls. – Children’s rooms often see increased wear from playful activities.
For interiors, repainting every 3–5 years is common for maintaining aesthetics.
Sometimes homeowners choose to repaint purely for aesthetic reasons—whether that’s refreshing outdated colors or aligning with new design trends:
– Neutral tones continue gaining popularity as versatile options for modern interiors.
– Bold accent walls can create focal points in living spaces. Repainting based on personal preferences allows spaces within your home feel refreshed while reflecting individual style preferences!
The Importance of Hiring Skilled Painters and Decorators for a Flawless Finish
When it comes to painting and decorating your home or commercial space, the expertise of skilled painters and decorators cannot be overstated. A professional finish not only enhances the overall appearance but also ensures durability and protection for years to come. Here, we explore why hiring experienced professionals is essential, along with some considerations for choosing the right team.
Why Hire Skilled Painters and Decorators?
Hiring professionals ensures quality work that stands out.
- Attention to Detail: Professionals understand the nuances of preparation, application, and finishing techniques. This attention to detail creates smooth surfaces, sharp edges, and flawless results.
- Time Efficiency: Experienced painters work methodically with a well-defined plan, completing projects in significantly less time than untrained individuals.
- Material Knowledge: Skilled professionals are familiar with different types of paints, finishes, tools, and materials. They can recommend the best-suited products for your specific needs.
- Surface Preparation Expertise: Proper prep work is critical for a long-lasting finish. Professionals excel in sanding, priming, filling cracks or holes in walls, ensuring the surface is ready for paint application.
- Durability: A well-executed paint job lasts longer by resisting chipping or peeling while maintaining its vibrant appearance over time.
Key Areas Where Professionals Make a Difference
| Task | DIY Effort | Professional Advantage |
| Surface Prep | Often rushed or incomplete | Thorough preparation ensures longevity |
| Paint Application | Uneven coats; risk of drips | Even layers with clean lines |
| Color Selection Guidance | Limited knowledge of palettes/finishes | Expert advice tailored to your vision |
| Time Management | Projects may stretch over weeks | Completed quickly without sacrificing quality |
Benefits of a Flawless Finish
- Increased Property Value
Homes with high-quality finishes often command higher prices in the real estate market due to their appealing presentation. - Enhanced Curb Appeal
For exterior projects especially, pristine finishes lend an immediate boost to curb appeal. - Long-Term Savings
An expertly applied coat not only looks better but also reduces maintenance costs over time by resisting wear-and-tear. - Custom Results
Professionals can achieve complex designs such as textured walls or intricate patterns that would be difficult without proper training.
Tips for Selecting the Right Professional Team
- Request multiple quotes to compare services and costs.
- Ask for references or review portfolios showcasing previous projects.
- Verify licenses/certifications where applicable.
- Discuss timelines upfront along with clear contracts outlining scope-of-work details.
- Ensure they use high-quality materials from reputable brands.
Final Thoughts on Professional Painting Services
Investing in skilled painters and decorators is an investment in your property’s future aesthetic appeal and structural integrity. Their expertise guarantees not only a beautiful finish but also peace of mind knowing that the job was done correctly ensuring satisfaction every time you step into your newly transformed space.
- Expert Insights on Interior vs Exterior Painting from a Leading Painting Company Florida
- How Florida painters Recommend Painting Your House and Inspiring Wall Ideas
- How Often Should Florida Painters Repaint Your Home’s Exterior for Long-Lasting Beauty
- How Often Should House Painters Florida Recommend Repainting Your House Exterior for Lasting Beauty
- How Often Should Florida Painters Repaint Your Home for Optimal Aesthetic and Protection
- How Often Should Florida Painters Repaint the Exterior of Your Home and Why It Matters
- How Often Should You Repaint Your Home with a Painting Company Florida to Keep It Looking Fresh and Beautiful
- Finding the Right Painting Company Florida for a Stunning Interior Transformation
- Room-by-Room Guide: How Florida Painters Recommend Repainting Your House Interior
How Often Should Florida Painters Repaint the Exterior of Your Home and Why It Matters
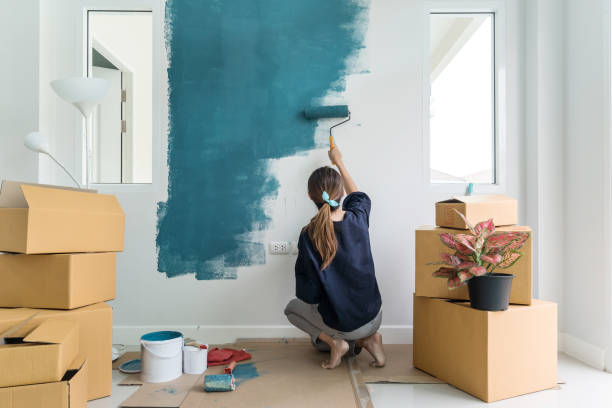
Maintaining the exterior paint of your home is not just about aesthetics; it’s also crucial for protecting your property from the elements. Various factors influence how often you should repaint, including climate conditions, the materials used in your home’s construction, and the quality of the previous paint job. Let’s explore this topic in detail to help you determine when it’s time to refresh your home’s exterior.
Factors That Affect How Often You Should Repaint
- Material Type:
Different surfaces require repainting at different intervals:
| Material | Repainting Interval | |——————|———————-| | Wood | Every 3–7 years | | Aluminum siding | Every 5–6 years | | Stucco | Every 5–10 years | | Brick | Every 15–20 years (if painted) | - Climate:
Homes in regions with extreme weather—such as high humidity, heavy rain, or intense sunlight—may need more frequent repainting due to faster wear and tear. - Quality of Paint and Application:
Premium paints typically last longer as they are more resistant to fading, cracking, and peeling. Proper surface preparation and professional application also improve longevity.
Why Regular Repainting Matters
- Protection Against Weather Damage:
Exterior paint serves as a barrier against moisture, UV rays, and temperature fluctuations. Over time, these natural elements can degrade unprotected surfaces, leading to issues like rot or mold growth. - Preserving Curb Appeal:
Faded or chipped paint makes a home look neglected. A fresh coat instantly revitalizes its appearance and can even boost property value. - Preventing Costly Repairs:
Neglecting deteriorated paint can result in damage that requires expensive repairs down the line. Repainting proactively minimizes such risks.
Signs It Might Be Time to Repaint
- Cracked, peeling, or bubbling paint
- Fading color due to sun exposure
- Visible water damage or mildew
- Exposed patches where underlying material shows through
Tips for Extending Paint Lifespan
- Use high-quality paints designed for outdoor use.
- Ensure proper preparation by cleaning surfaces thoroughly before painting.
- Opt for lighter colors in sunny climates since they absorb less heat.
- Perform regular maintenance such as cleaning off dirt buildup with a garden hose or soft brush.
Regular attention to your home’s exterior paint not only preserves its beauty but also protects its structural integrity over time. By understanding how often you should repaint—and acting accordingly—you’ll save money while maintaining a durable, eye-catching finish for years to come.
Enhance Your Home’s Exterior with a Trusted Painting Company Florida
Proper care and maintenance of your home’s exterior paint can significantly extend its lifespan, saving you money and preserving your home’s aesthetic appeal. Exterior paint serves as both a protective barrier and a decorative layer, making it crucial to ensure its durability over time. Below are some expert recommendations to help you maximize the longevity of your exterior paint.
Factors Affecting Paint Longevity
- Homes in areas with harsh weather conditions—such as intense sunlight, high humidity, or frequent rain—face quicker paint degradation. UV rays can cause fading, while moisture can lead to peeling or blistering.
- Different surfaces hold paint better than others:
| Material | Typical Paint Life Span | |————————|————————–| | Wood | 3-7 years | | Stucco | 5-10 years | | Brick | 15-20 years | | Vinyl/PVC | Up to 10 years | - High-quality paints often include durable resins and pigments that resist wear and tear more effectively than lower-cost alternatives.
- Proper surface preparation—cleaning, sanding, and priming—is essential before applying new layers of paint for strong adhesion.
Best Practices for Prolonging Exterior Paint Life
- Regular Cleaning: Dirt, mold, and mildew accumulate on painted surfaces over time, leading to early breakdowns in the protective layers. Pressure wash or hand-clean surfaces annually.
- Inspect Annually: Look for signs of peeling, cracking, or discoloration that might indicate structural issues or environmental damage requiring attention.
- Seal Gaps and Cracks: Use caulk to seal gaps around windows, doors, or trim pieces to prevent water intrusion that can weaken the paint.
- Choose Weather-Specific Products: Select paints designed specifically for your local climate (e.g., UV-resistant formulas for sunny regions).
Signs That Repainting Might Be Necessary
- Fading colors that diminish curb appeal.
- Peeling or flaking areas where the top layer separates from the surface.
- Bubbling caused by trapped moisture beneath the paint.
- Chalky residue when running a hand across painted walls—a sign of pigment breakdown.
Additional Tips for Longevity
- Wood siding usually requires repainting every 5–7 years.
- Stucco surfaces may last up to a decade before needing new coats.
- Invest in premium exterior-grade paints with features like fade resistance or built-in primers.
- Hire professional painters if unsure about prepping surfaces correctly; this ensures a thorough job with lasting results.
By implementing these strategies consistently over time, you’ll not only improve the longevity of your home’s exterior paint but also enhance its protection against environmental stressors and maintain its visual appeal year-round.
Discover Why House Painters Florida Recommend Regular Repainting for Your Home’s Appeal
Maintaining your home’s curb appeal is essential, not only for personal satisfaction but also to enhance its value and appearance. The exterior of your home is the first impression it makes on visitors, neighbors, and potential buyers. Over time, environmental factors can take a toll on your home’s paint, causing it to fade, peel, or crack. Regular repainting plays a crucial role in preserving your home’s aesthetic charm while providing additional benefits.
How Paint Affects Your Home’s Appearance
- Color Coordination: A well-chosen exterior color enhances architectural features and ensures harmony with surrounding elements like landscaping or neighboring homes.
- Style Updates: Trends change over time, and refreshing the paint can modernize an older property.
- Clean Appearance: Fresh paint gives your home a clean and polished look that instantly elevates its overall presentation.
Signs That Your Home Needs Repainting
- Faded Colors: Prolonged sun exposure causes pigments in exterior paint to break down, leading to dull or washed-out colors.
- Peeling or Cracking Paint: This often occurs when moisture seeps under the paint layer or due to poor surface preparation during a previous job.
- Chalking: A white powdery residue on walls indicates aging paint that has started breaking down.
- Visible Mold or Mildew: Dark spots on painted surfaces may signal water damage beneath the surface.
- Outdated Colors: If the current color no longer aligns with your tastes or trends, it may be time for an update.
Benefits of Regular Repainting

- Enhanced Durability: Coating materials like acrylic latex protect against harsh weather conditions such as rain, wind, snow, and UV rays.
- Increased Property Value: Updated exteriors attract buyers and could lead to higher resale prices.
- Preventative Maintenance: Addressing peeling or cracking early prevents underlying structural problems like wood rot or water damage.
| Paint Type | Average Lifespan (Years) | Ideal Surfaces |
| Acrylic Latex | 7–10 | Most exteriors |
| Oil-based Paint | 5–7 | High-moisture areas |
| Elastomeric Coating | 10–15 | Stucco & Masonry |
Professional Tips for Maintaining Aesthetic Appeal
- Choose high-quality paints formulated for specific climates in your region.
- Regularly clean dirt, debris, and mildew buildup from surfaces using gentle cleaning solutions.
- Avoid DIY shortcuts—professional painters ensure better prep work like sanding rough surfaces or filling cracks before applying new coats.
By understanding how regular repainting contributes to both beauty and protection for your house exteriors, you can make informed decisions about maintaining its charm effectively over time.
Expert Advice on Choosing the Best Painting Services Florida Offers for Your Home
Repainting the exterior of your home can be a substantial investment, but it’s an essential part of maintaining both its appearance and structural integrity. Knowing when to repaint can save you money in the long run by preventing damage and extending the life of your home’s exterior. Below are expert tips to help you determine when it may be time to take on this critical task.
Common Signs That Indicate It’s Time to Repaint
- Fading Color: UV exposure causes paint to fade over time, especially on surfaces that receive direct sunlight for prolonged periods.
- Peeling or Cracking: As paint ages or if it was improperly applied, it can begin peeling or cracking, exposing the surface underneath.
- Chalking: If you notice a fine white powder on your hands after touching painted surfaces, this indicates that the paint is breaking down.
- Mold or Mildew Growth: Dark spots of mold or mildew not only affect aesthetics but also signal moisture issues affecting your home’s exterior.
- Exposed Wood or Metal: If bare wood or metal is visible due to worn-out paint layers, immediate attention is required to prevent rot or rust.
Factors Influencing Repainting Frequency
| Factor | Time Between Paint Jobs |
| Surface Material | |
| – Wood | 3–7 years |
| – Stucco | 5–10 years |
| – Brick | 15–20 years (if painted) |
| Climate and Environment | |
| – Humid/Rainy Areas | 3–5 years |
| – Dry/Sunny Regions | 5–10 years |
- Quality of Paint Used: Higher-quality paints last longer due to better pigmentation and durability.
- Surface Preparation: Proper surface cleaning and priming before application greatly enhance longevity.
Seasonal Considerations for Painting
- Mild temperatures allow even drying without extreme heat.
- Minimal rainfall reduces interruptions in painting schedules.
- Cooler conditions ensure no cracks form due to rapid drying under intense heat.
- Lower humidity levels improve paint adherence.
Maintenance Tips to Prolong Exterior Paint Life
- Wash your home’s exterior annually using a soft brush and mild detergent to remove dirt, debris, and contaminants.
- Inspect for cracks, gaps, or other signs of wear at least twice a year.
- Use caulk to address small cracks before they allow moisture penetration.
- Trim nearby trees or shrubs regularly so they don’t rub against painted surfaces.
By keeping an eye out for these indicators and following expert advice tailored to your specific environment and materials, you can ensure that your home remains both beautiful and well-protected over time.
A Comprehensive Guide to Interior & Exterior Painting Florida for Long-Lasting and Vibrant Results
Maintaining the exterior paint of your home is essential to protect its structure, preserve its aesthetic appeal, and ensure long-term durability. Proper maintenance not only extends the lifespan of your exterior paint but also saves you money on frequent repainting. Below is a comprehensive guide designed to help you keep your home’s exterior looking vibrant and well-maintained.
Benefits of Maintaining Exterior Paint
- Enhanced Curb Appeal
A well-maintained paint job can significantly improve your home’s appearance, creating a welcoming impression for guests or potential buyers. - Protection Against Weathering
Quality exterior paint acts as a barrier against harsh environmental factors like UV rays, rain, wind, and temperature fluctuations. - Prevention of Structural Issues
Regular maintenance prevents moisture from seeping into the walls, which can lead to mold growth, wood rot, or cracks. - Cost-Effectiveness Over Time
By addressing minor issues early and maintaining your paint properly, you can minimize the frequency and cost of major repairs or repainting efforts.
Key Practices for Maintaining Exterior Paint
- Inspect Your Home Regularly
Conduct visual inspections every 6–12 months to check for peeling paint, cracks, or surface damage. Early detection of issues can prevent further deterioration. - Clean the Surface Annually
Dirt and debris buildup can cause discoloration or mildew growth over time. Use a garden hose or pressure washer on a low setting with mild detergent to clean the painted surface annually. - Address Small Flaws Promptly
Repair chips or cracks in the paint as soon as they appear. This prevents water from infiltrating exposed areas and causing damage beneath the surface. - Reapply Caulking as Needed
Inspect caulking around windows, doors, and siding joints periodically to ensure it remains intact. Reapply caulk if you notice any gaps or shrinking. - Trim Landscaping Near Walls
Keep trees, shrubs, and other vegetation at least one foot away from your home’s painted surfaces to minimize moisture retention and avoid physical damage to the walls.
Recommended Maintenance Schedule Based on Paint Type
| Paint Type | Average Lifespan | Recommended Maintenance Interval |
| Acrylic/Latex-Based | 7–10 years | Annual cleaning; inspect every 6 months |
| Oil-Based | 5–7 years | Annual cleaning; inspect every year |
| Specialty Coatings | Varies (10+ years) | Follow manufacturer guidelines |
Note: The lifespan may vary depending on weather conditions in your region and surface preparation quality during initial application.
Signs It’s Time for Professional Repainting
- Fading colors due to prolonged sun exposure.
- Extensive peeling or flaking that exposes bare surfaces.
- Persistent mold or mildew stains that cannot be cleaned off.
- Bubbling paint caused by trapped moisture beneath the surface.
- Cracks in wooden siding that compromise structural integrity.
If several of these factors are present simultaneously despite regular upkeep efforts, consulting a professional painter is advisable for an accurate assessment and quality repainting services.
By following these guidelines consistently over time, you’ll protect your investment while ensuring vibrant curb appeal across all seasons—keeping both aesthetic value high and structural health intact for years ahead.
- Expert Insights on Interior vs Exterior Painting from a Leading Painting Company Florida
- How Florida painters Recommend Painting Your House and Inspiring Wall Ideas
- How Often Should Florida Painters Repaint Your Home’s Exterior for Long-Lasting Beauty
- How Often Should House Painters Florida Recommend Repainting Your House Exterior for Lasting Beauty
- How Often Should Florida Painters Repaint Your Home for Optimal Aesthetic and Protection
- How Often Should Florida Painters Repaint the Exterior of Your Home and Why It Matters
- How Often Should You Repaint Your Home with a Painting Company Florida to Keep It Looking Fresh and Beautiful
- Finding the Right Painting Company Florida for a Stunning Interior Transformation
- Room-by-Room Guide: How Florida Painters Recommend Repainting Your House Interior
How Often Should You Repaint Your Home with a Painting Company Florida to Keep It Looking Fresh and Beautiful

Keeping your home looking fresh and well-maintained involves regular upkeep, and repainting is one of the most effective ways to rejuvenate its appearance. However, determining how often you should repaint your home depends on several factors, such as the type of surface, exposure to weather conditions, and the quality of the previous paint job. Below, we delve into key considerations that determine repainting frequency.
Factors That Influence Repainting Frequency
- Exterior Walls: The type of material plays a significant role in how often you’ll need to repaint. For instance:
- Wood surfaces typically need painting every 3-7 years.
- Stucco may last 5-10 years before requiring a new coat.
- Brick surfaces can go up to 15-20 years if properly maintained.
- Interior Walls: The frequency for interior walls varies depending on their use:
- High-traffic areas such as hallways or kitchens may need new paint every 3-5 years due to wear and tear.
- Low-use spaces like guest rooms might last over a decade with minimal touch-ups.
- Climate and Weather Conditions
Homes located in areas with harsh weather—such as extreme heat, heavy rain, or snowfall—will likely require more frequent repaints than houses in moderate climates. UV rays can fade exterior colors over time, while humidity can cause peeling or mold growth. - Quality of Paint Used
Premium-quality paints tend to last longer than cheaper alternatives because they are formulated for durability and resistance to fading or cracking. - Previous Painting Application
Proper preparation (e.g., sanding, priming) by professional painters ensures that paint adheres better and lasts longer than a rushed DIY job. - Personal Preference
Some homeowners choose frequent repainting simply to keep up with changing trends in color schemes or personal tastes.
Recommended Repainting Timelines
| Surface Type | Recommended Repainting Interval |
| Wood Siding | Every 3-7 Years |
| Aluminum Siding | Every 5 Years |
| Brick (Exterior) | Every 15-20 Years |
| Stucco | Every 5-10 Years |
| Interior Walls (High Traffic) | Every 3-5 Years |
| Interior Ceilings | Every 10+ Years |
Tips for Longer Paint Lifespan
- Choose high-quality paints that are designed for specific surfaces (e.g., moisture-resistant paints for bathrooms).
- Ensure proper surface preparation before applying new coats; this includes cleaning, sanding, priming, and repairing cracks or holes.
- Perform regular maintenance such as cleaning walls gently with non-abrasive cleaners.
- Opt for professional painting services whenever possible to ensure precision application techniques.
By taking these factors into account and monitoring the condition of your home’s paintwork periodically, you can ensure it remains vibrant and well-protected against environmental damage while reducing long-term costs associated with frequent repaints.
How Florida painters Deliver High-Quality Results for Your Exterior Painting Needs
When it comes to maintaining or improving the appearance of your home, high-quality exterior painting is essential. While it may be tempting to take a DIY approach, hiring professional painters ensures long-lasting, flawless results. Let’s explore the key benefits of entrusting this task to experts.
Expertise and Skill of House Painters Florida
Professional painters bring years of experience and technical expertise to every project. They understand the nuances of working with different surfaces, paint types, tools, and weather conditions. This ensures:
– Uniform application for a polished finish
– Optimal paint adherence for durability
– Accurate preparation of surfaces by filling cracks, sanding rough areas, and priming when necessary
Their knowledge reduces the likelihood of mistakes that could result in uneven finishes or peeling paint over time.
Expert Painting Services Florida with Access to Quality Materials
Professionals have access to premium-quality paints and tools that are not commonly available at standard hardware stores. High-grade materials ensure:
– Better coverage with fewer coats
– Superior resistance to fading caused by sun exposure
– Protection against moisture and harsh weather conditions
Using these materials enhances the longevity and aesthetic appeal of your home’s exterior.
Time Efficiency & Reduced Stress
Painting an entire house exterior is time-consuming and labor-intensive. Professionals streamline the process by:
1. Planning effectively based on project size and complexity
2. Working systematically to meet deadlines without sacrificing quality
3. Handling all logistical details such as equipment setup, cleanup, and disposal
This saves homeowners time while eliminating the stress associated with managing a large project themselves.
Safety Measures During Painting Projects
Exterior painting often involves working at heights using ladders or scaffolding. Professional painters prioritize safety by employing proper techniques and equipment such as:
– Sturdy scaffolding systems for stability during higher-level work
– Harnesses or fall prevention systems if needed
– Protective clothing, masks, and eyewear when handling hazardous chemicals or paints
Their training minimizes risks associated with accidents or injuries during the job.
Cost Effectiveness in the Long Run
Although hiring professionals might seem like an upfront investment, it saves money over time due to their ability to deliver durable results. Key cost advantages include:
| DIY Painting | Professional Painting Services |
|——————————-|——————————————|
| Frequent touch-ups required | Long-lasting finish reduces maintenance |
| Potential material wastage | Efficient use of resources |
| Equipment purchase costs | Tools provided as part of service |
By opting for professionals initially, homeowners avoid additional expenses related to redoing poor-quality work.
Enhanced Curb Appeal & Property Value
- Freshly painted homes attract more buyers due to their well-maintained look.
- Neutral yet modern color choices recommended by professionals appeal to a broader audience.
Letting experts handle this job ensures that potential buyers perceive your home as well cared for.
By leveraging professional painting services for your home’s exterior, you benefit from expert craftsmanship combined with high-quality materials that last longer while enhancing both aesthetic value and functionality effortlessly.
Expert Guide to Choosing the Best Plastering and Painting Services
When it comes to enhancing the aesthetic appeal and structural integrity of your home, selecting the right plastering and painting services is critical. A reputable service provider can ensure high-quality results while saving you time, effort, and potential headaches. Here’s a detailed guide to help you make informed decisions when hiring plastering and painting professionals.
Assess Your Needs
- Scope of Work: Do you need interior painting, exterior painting, plaster repair, or all of these?
- Type of Finish: Are you looking for matte, satin, gloss finishes? Do you want textured walls or smooth surfaces?
- Timeline: Is there a specific deadline for the project?
- Budget: How much are you willing to spend on this renovation?
Clearly defining your requirements ensures that you’ll find a service provider equipped to deliver the results you desire.
Research Local Providers
- Experience: Companies with several years in business are more likely to have honed their skills and processes.
- Reputation: Read online reviews on platforms like Google or Yelp, and ask friends or neighbors for recommendations.
- Certifications and Licenses: Ensure they meet local regulations and hold certifications that demonstrate their expertise.
- Portfolio: Review examples of their previous work through photos or case studies.
Compare Quotes
- Request written quotes from at least three providers.
- Verify that each quote includes detailed information about labor costs, materials, estimated timeframes, and additional fees (if any).
- Avoid choosing solely based on price; very low quotes could indicate subpar materials or unskilled labor.
| Company Name | Years of Experience | Estimated Cost | Included Services | Customer Reviews (Rating) |
| ABC Painting Co. | 15 | $3,500 | Interior + Exterior Painting | 4.5/5 |
| Plaster Masters Ltd | 10 | $2,800 | Plaster Repairs + Texturing | 4/5 |
| ColorCraft Experts | 8 | $3,200 | Full-Service Painting | 4.7/5 |
Evaluate Communication Skills
- Prompt responses to calls/emails.
- Willingness to answer questions about materials or techniques.
- Transparency in discussing project timelines.
Inspect Materials Used
- Type of paint (e.g., acrylic-based vs oil-based).
- Plaster mixes used for repairs (e.g., traditional lime vs modern gypsum).
- Brand preferences – established brands often guarantee better performance.
Questions to Ask During Consultation
- Do you offer warranties on your work?
- Are your team members insured?
- What safety measures do you take during projects?
- Can I see references from previous clients?
Warning Signs to Watch Out For
- Be cautious if a provider demands full payment upfront.
- Avoid companies reluctant to provide written contracts or estimates.
- Stay away from those with unclear terms regarding warranties or guarantees.
By following these steps meticulously, you’ll be well-equipped to hire plastering and painting services that align with your vision while delivering exceptional results tailored specifically for your home’s needs.
How Professional Painters Ensure Flawless Results for Your Home’s Interior and Exterior
Hiring professional painters is a worthwhile investment when it comes to enhancing the look and longevity of your home’s interior and exterior. Their expertise, tools, and precision make a significant difference in achieving high-quality results. Below is an in-depth look at how professional painters ensure perfection in their work.
Thorough Surface Preparation
- Cleaning the Surface: Removing dirt, grease, mildew, or old peeling paint through washing or scraping.
- Filling Cracks and Holes: Using fillers or caulk to repair imperfections such as nail holes or cracks in walls.
- Sanding for Smoothness: Sanding walls or trim surfaces to remove bumps or previous uneven layers of paint.
- Priming: Applying primers to create a stable base that improves paint adhesion and durability.
Use of High-Quality Materials
- Durability: Premium paints resist fading, cracking, and peeling better than lower-quality options.
- Better Coverage: High-quality paints often require fewer coats while providing even color.
- Eco-Friendly Choices: Many professionals opt for low-VOC (volatile organic compound) paints for healthier indoor air quality.
Color Selection Expertise
- They assess your space’s lighting conditions (natural vs artificial) before recommending shades that will complement your home’s features.
- They can suggest popular trends as well as timeless color palettes.
- Professionals may create test swatches on walls to help you visualize how colors will appear once applied.
Efficient and Detailed Application Process

- Taping Off Edges: Using painter’s tape around edges like ceilings, trims, and windows ensures clean lines without smudging.
- Layering Paint Evenly: Starting with thin layers prevents streaks or drips—allowing each coat time to dry properly before applying another.
- Precision Work on Trim & Details: Professionals use small brushes for detailed areas such as crown molding or window sills.
Safety First Approach
- Wearing protective gear like masks and gloves when needed.
- Using sturdy ladders with proper balancing techniques for high areas.
- Ensuring proper ventilation during indoor painting projects.
| Safety Aspects | Techniques Used by Professionals |
| Ladder Work | Secure placement; avoiding overreaching |
| Paint Fumes | Ventilation through open windows/air movers |
| Protective Gear | Masks, gloves & goggles |
Post-Painting Inspection & Cleanup
After completing the project, reputable painters conduct an inspection with you to ensure satisfaction with their work. Additionally, they handle cleanup efficiently by disposing of leftover paint cans safely, removing tarps/drop cloths used during painting, and leaving your space neat.
By adhering closely to these practices—ranging from preparation through cleanup—professional painters deliver remarkable results that transform interiors into welcoming spaces while boosting curb appeal outdoors efficiently.
How Professional Painters Ensure Flawless Results for Your Home’s Interior and Exterior
Comprehensive Surface Preparation
The foundation of a flawless paint job begins with meticulous surface preparation. Professionals take the time to ensure all surfaces are clean, smooth, and ready for paint application. Key steps include:
– Cleaning: Dirt, grease, and mold are removed using appropriate cleaning agents to ensure the paint adheres properly. For exteriors, pressure washing may be employed.
– Sanding: Uneven surfaces are sanded down to create a smooth base for painting.
– Filling Holes and Cracks: Gaps or imperfections in walls are repaired with high-quality fillers or caulk for an even surface.
– Priming: Applying primer helps seal the surface and ensures better paint adhesion while enhancing durability.
Selection of Premium Materials
Professional painters understand that the quality of materials directly affects the outcome of the project. They carefully select:
– Paint Type: Choosing paints tailored for specific surfaces (e.g., wood, drywall, stucco) and conditions (interior vs. exterior).
– Finishes: Selecting finishes like matte, satin, or gloss based on aesthetic preferences and room function. For instance:
| Paint Finish | Best Usage Area |
|——————|——————————————|
| Matte | Bedrooms, ceilings |
| Satin | Living rooms, hallways |
| Semi-gloss | Kitchens, bathrooms (easy to clean) |
Expertise in Color Matching and Application Techniques
Professional painters possess an eye for color coordination and expertise in applying paint efficiently without streaks or uneven patches:
1. Color Consultation: They offer advice on trendy palettes while ensuring harmony with your existing decor or exterior surroundings.
2. Even Coating Techniques: Professional-grade tools like high-quality brushes, rollers, and sprayers allow them to apply even coatings with precision.
3. Multiple Coats When Needed: To achieve rich tones or cover previous colors effectively.
Attention to Safety Standards
Painting often involves hazardous chemicals such as VOCs (volatile organic compounds) in certain paints or working at heights during exterior projects:
– Professionals use ladders or scaffolding safely when dealing with hard-to-reach areas.
– They ensure proper ventilation when using products indoors.
Time Efficiency Without Sacrificing Quality
A DIY painting project can stretch over weeks if you’re unfamiliar with techniques or don’t have proper equipment. Professionals streamline the process by adhering to systematic workflows that save time without compromising results.
Long-Term Durability Assurance
With their experience in handling varying surfaces and environmental factors (e.g., humidity for interiors or UV exposure for exteriors), professional painters apply coatings designed to withstand wear-and-tear over time.
By combining thorough preparation practices with technical expertise and premium materials, professional painters deliver impeccable results that enhance your home’s beauty while ensuring lasting appeal.
Step-by-Step Process of Hiring Skilled Painters for Your Next Painting Project
Hiring skilled painters for your painting project is essential to achieving a professional, long-lasting finish. A systematic approach ensures that you select the right team, stay within budget, and see outstanding results. Here’s a step-by-step guide to help you navigate the process effectively.
1. Define the Scope of Your Project
Before reaching out to painters, have a clear understanding of your project requirements. Consider the following:
– Areas to be painted: Interior, exterior, or both?
– Condition of walls: Are there any cracks or repairs needed?
– Type of finish: Matte, satin, gloss, or specialty finishes like textured paints?
– Color preferences: Do you have specific colors in mind or will you need color consultation?
Having this information ready not only helps painters provide accurate quotes but also ensures clarity when discussing expectations.
2. Research Potential Painters
Invest time in finding reputable professionals. Use these methods to compile a list:
– Online reviews and ratings: Check platforms like Google Reviews or Yelp for feedback on local painting companies.
– Recommendations from friends and family: First-hand experiences are invaluable for identifying trustworthy professionals.
– Professional directories: Websites like Angi (formerly Angie’s List) offer verified listings of contractors in your area.
Create a shortlist based on credentials such as licensing, insurance coverage, and years of experience.
3. Request Quotes and Compare Them
Reach out to at least three contractors from your shortlist for detailed estimates. Ensure that each quote includes the following details: | Item | Details Needed | |————————|————————————————–| | Labor costs | Hourly rates or total project cost | | Material costs | Brand and type of paints being used | | Timeline | Start date, completion date | | Warranty/guarantee | Coverage period for touch-ups or repairs |
Avoid choosing solely based on price—assess value by considering quality and professionalism.
4. Ask the Right Questions During Interviews
When speaking with potential painters, prepare key questions to gauge their expertise:
– How many similar projects have you completed recently?
– Can you provide references from past clients?
– Are you comfortable working with specific paint brands if requested?
– What is your process for protecting furniture and flooring during the job?
Their responses will help clarify whether they are experienced and customer focused.
5. Verify Credentials
Ensure that your chosen painter meets all legal requirements:
– License: Check if they have an active contractor’s license in your state.
– Insurance: Verify liability insurance to cover accidents or damages.
– Certifications (if applicable): These indicate specialized training (e.g., lead-safe certifications for older homes).
This step protects you from potential financial risks during the project.
6. Review Contracts Thoroughly Before Signing
A professional painter will provide a written contract before starting work. Ensure it includes:
1. Detailed scope of work.
2. Payment terms (deposit amount and final payment schedule).
3. Project timeline.
4. Paint brands/colors agreed upon.
5. Cleanup responsibilities post-project completion.
Ensure everything discussed verbally is documented before signing.
7. Communicate Regularly During the Project
Once work begins, maintain open communication with the painters:
– Discuss daily progress updates.
– Address concerns immediately if they arise.
– Confirm adherence to agreed-upon timelines or resolve delays amicably.
Regular communication avoids misunderstandings while ensuring projects stay on track.
By following this structured approach when hiring skilled painters, homeowners can minimize stress while achieving exceptional results tailored to their needs.
Creative Ways to Use Color and Texture in Your Painting Design
Integrating color and texture into your painting design can transform a space, adding depth, personality, and visual interest. Whether you are redecorating a single room or revamping an entire property, understanding how to use these elements effectively is key. Below are some creative ways to experiment with color and texture for a stunning design.
Understanding the Role of Color
- Accent Walls: Paint one wall in a bold or contrasting color to create a focal point without overwhelming the room.
- Monochromatic Palettes: Stick to variations of a single hue for a sophisticated and cohesive look.
- Complementary Colors: Use colors opposite each other on the color wheel (e.g., blue and orange) for dynamic contrast.
- Neutral Base with Pops of Color: Keep walls neutral but introduce bright colors through trim, furniture, or decorative elements.
Adding Texture for Depth
- Metallic Paint: Add shimmer and shine for modern or industrial spaces.
- Sand Textures: Create subtle grit or roughness perfect for rustic themes.
- Stucco Effects: Mimic plastered walls with paint additives.
- Sponging: Apply layers of colors using sponges to create depth.
- Rag Rolling: Roll a crumpled rag over wet paint for soft, textured patterns.
- Marbling: Simulate the appearance of marble on walls using layering techniques.
- Pair painted surfaces with materials like wood paneling, brick veneers, or wallpaper inserts that add both visual interest and texture.
| Technique | Best Suited For | Tools/Materials Required |
| Sponging | Living rooms, bedrooms | Sponge, two shades of complementary paints |
| Metallic Paint | Accent walls | Metallic paint finishers |
| Rag Rolling | Hallways | Crumpled cloth/rags |
| Stucco Effects | Rustic interiors | Trowel tools & specialty paints |
Combining Color & Texture
- Use dark textures (e.g., embossed patterns) against light-colored walls for contrast.
- Incorporate gradient effects by blending two shades across textured finishes.
- Experiment with matte vs glossy finishes within the same palette to highlight specific areas.
Tips for Success
When working on advanced painting designs:
– Test samples on small wall sections before committing fully to ensure compatibility with lighting conditions.
– Avoid overcrowding textures if using multiple bold colors; balance is key to avoid making spaces look chaotic.
– Consider professional consultation when implementing complex faux techniques or large-scale textured finishes.
By thoughtfully combining creative uses of color and texture within your painting design strategy, you can craft visually compelling interiors that reflect your style while enhancing the overall ambiance.
- Expert Insights on Interior vs Exterior Painting from a Leading Painting Company Florida
- How Florida painters Recommend Painting Your House and Inspiring Wall Ideas
- How Often Should Florida Painters Repaint Your Home’s Exterior for Long-Lasting Beauty
- How Often Should House Painters Florida Recommend Repainting Your House Exterior for Lasting Beauty
- How Often Should Florida Painters Repaint Your Home for Optimal Aesthetic and Protection
- How Often Should Florida Painters Repaint the Exterior of Your Home and Why It Matters
- How Often Should You Repaint Your Home with a Painting Company Florida to Keep It Looking Fresh and Beautiful
- Finding the Right Painting Company Florida for a Stunning Interior Transformation
- Room-by-Room Guide: How Florida Painters Recommend Repainting Your House Interior